REVIEW: Eagle Eye Lights HID Kit

A continuously growing trend in the offroad industry is upgraded lighting including HID lamps. HID stands for High Intensity Discharge. The HID bulbs create an arc which heats up metal salts inside to the point where they become plasma. This plasma greatly increases the intensity of the light and allows for reduced power consumption while on. Ballasts are used to get the arc started and then maintain the proper amount of power for the remaining run time. HID lighting is much more durable in offroad conditions since the arc replaces the fragile filament found in halogen bulbs. And despite the idea of turning metal salt into plasma, HID lights actually run much cooler and use less power than halogen.

Eagle Eye Lights HID Review

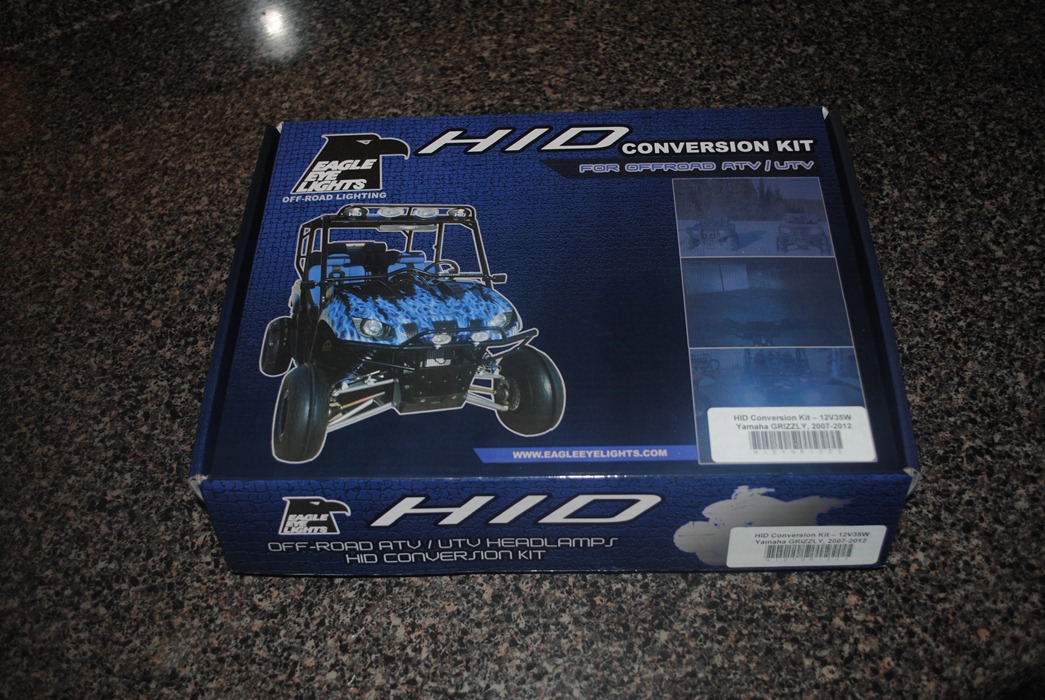
Southern California’s Eagle Eye Lights has been manufacturing offroad lighting solutions since the 1990’s. They have halogen, HID and LED packages. Their HID options include Plug-N-Play HID conversion kits for most popular ATVs and UTVs. They recently sent us their HIDYGRIZZ2 headlight conversion kit to try out.

Eagle Eye Lights HID Kit

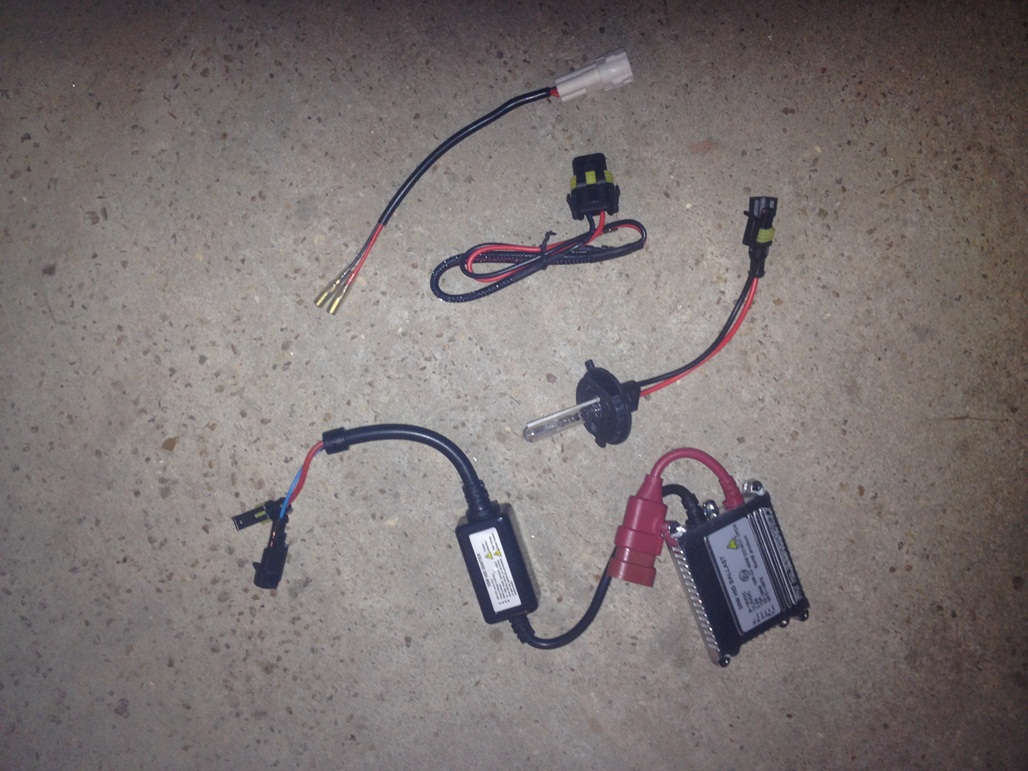
Half the kit, this is what your factory light and wiring harness is replaced with.

The HIDYGRIZZ2 kit is designed for 2007-2013 Yamaha Grizzly 550 and 700 models. It features two HID Xenon bulbs with 35 watt ballasts. Mounting hardware and Plug-N-Play wiring harnesses are included. Installation is touted to take about 20 minutes. The bulbs have a 2000+ hour life expectancy and put out 6,000 Kelvin (K). Kelvin is the color hue of the light. For comparison, a 55 watt halogen bulb produces 2300K, which gives it the yellowish color. Daylight is about 4300K. The 6,000K of Eagle Eye Lights provides for the best color option without sacrificing output.

Eagle Eye Lights HID

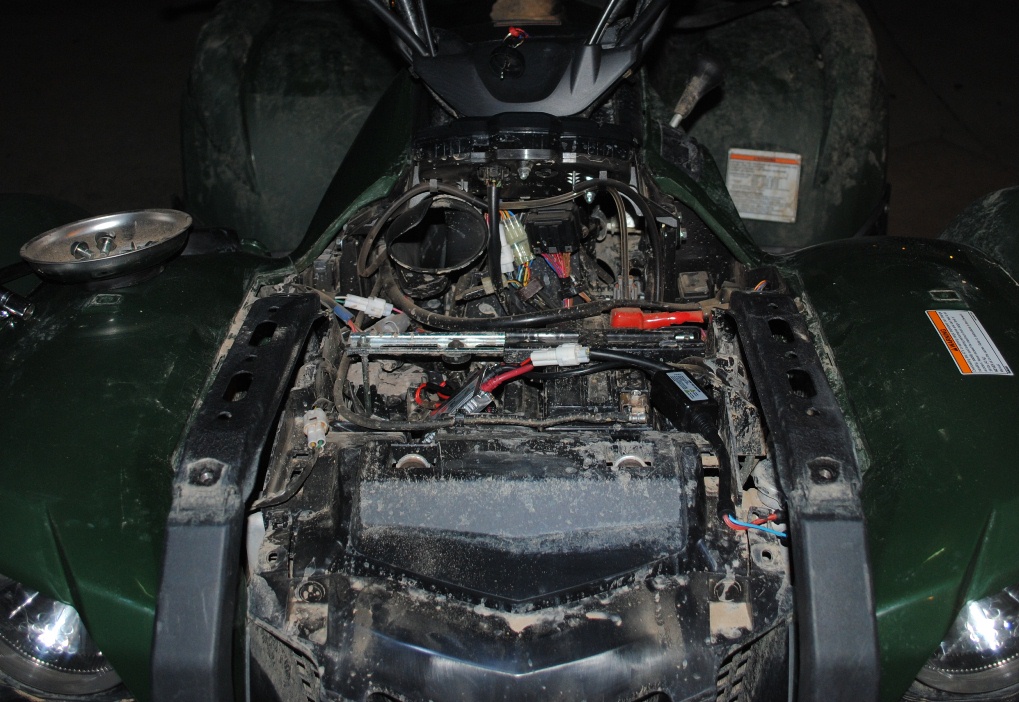
Getting to the factory wiring harness and feeding the replacement required some panel removal.

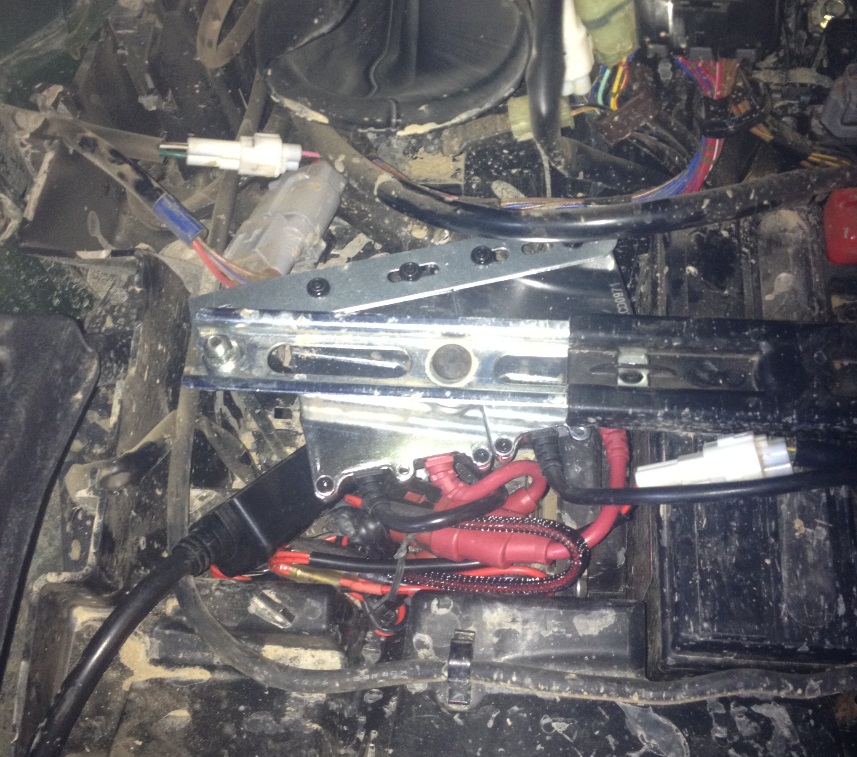
We conducted our install on a 2012 Yamaha Grizzly 550. While we can’t speak to the Grizzly 700, we can say that the 20 minute install on a 550 is not likely to happen. The instructions are fairly vague from what we would have expected. It’s pretty much just remove the rubber boot, switch out the headlights and plug in the various wiring harnesses while mounting the ballast somewhere. We found that the wiring harness connection was under the dash and required the removal of the front rack and dash for the installation. All of the connections are solid, waterproof connections and truly plug-n-play. The kit included two mounting brackets for the ballasts. Again, there were no instructions as to where the ballasts should be mounted so we modified one bracket to hold both ballasts and mounted it on the bar that holds down the battery. There is a nice void there that gave plenty of room for the ballasts and slack wiring.

Eagle Eye Lights HID

Our ballasts and extra wiring tucked into the void beside the battery. It’s the clean parts!

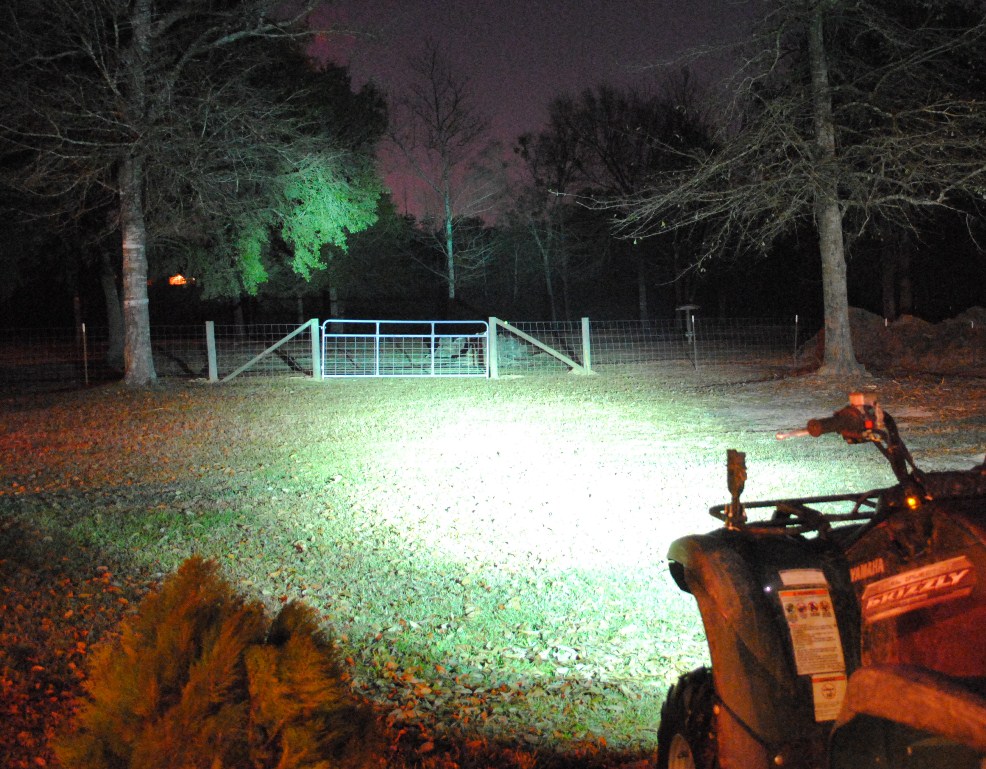
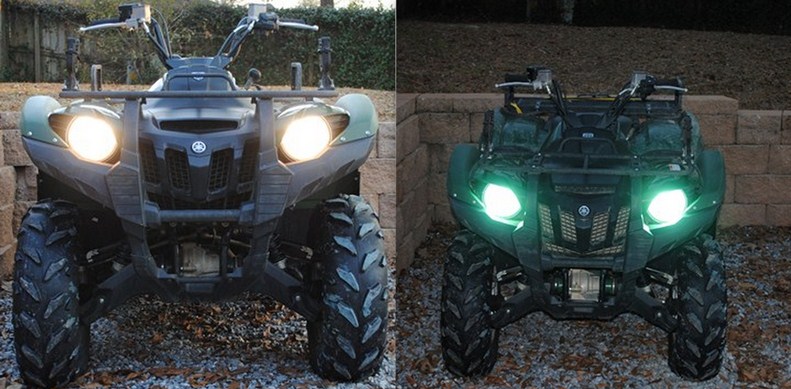
Once the installation was completed we fired up the lights. There is a very noticeable difference in the color of the light. It is more natural and requires less eye strain. There is also an increase in the visible range provided by the upgraded lights.

Eagle Eye Lights HID

Before: Yamaha factory halogen lights.

Eagle Eye Lights HID

After: Eagle Eye Lights HID Kit. Notice the trees in the distance are much more visible.

The instructions recommend upgrading the factory headlight fuse from 15 AMPs to 20 AMPs. The reason is for the increased amount of power required to start-up the ballasts. It can result in one or both lights not powering up. We confirmed this experience in our own tests where we saw only one light power up without the upgraded fuse.

Eagle Eye Lights HID Kit

Bottom line, these lights are an excellent addition. If you commonly ride at night, an Eagle Eye Lights HID Kit would be a perfect add-on and provide for a safer ride. While the installation may take a little longer on your particular ride, it is still one of the easier installations you’ll probably ever do. The kits range from $99 to $199; our test kit lists for $179. For more information on Eagle Eye Lights and what they have for your ATV or side-by-side, see their website at http://www.eagleeyelights.com/ and check back with us for future reviews of their lights.

REVIEW: Bubba Rope Lil’ Bubba Recovery Rope

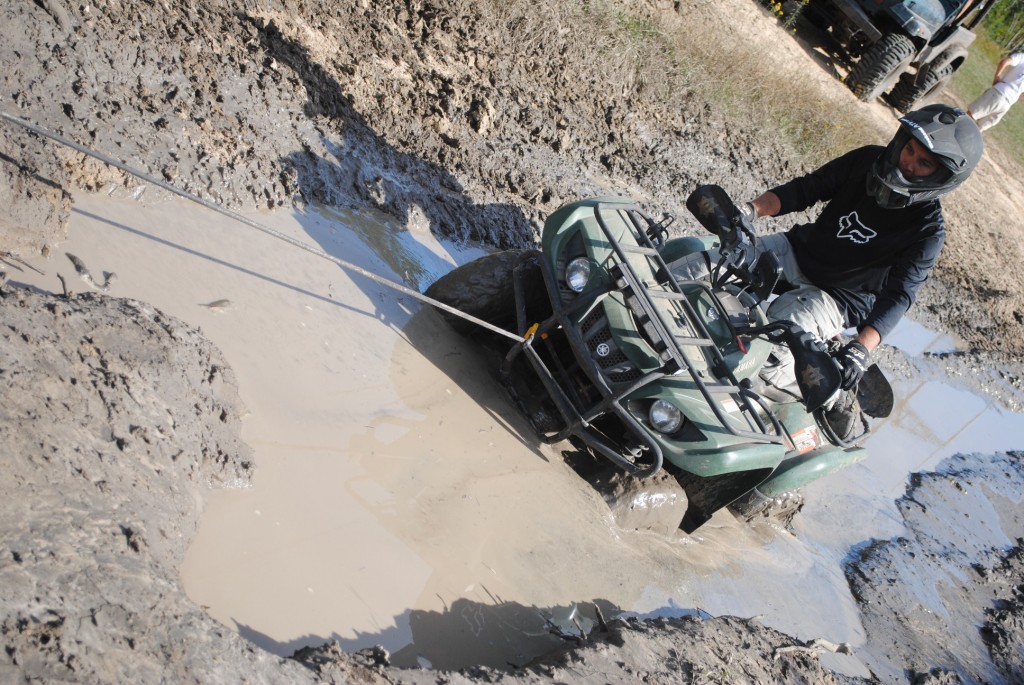
There are two vital lessons to off-roading that are often learned the hard way. Don’t do any serious riding alone and always, ALWAYS bring a tow rope. Over the past couple of weeks we have put the Lil’ Bubba recovery rope by Bubba Rope to the test and it is certainly one of the best ropes money can buy.

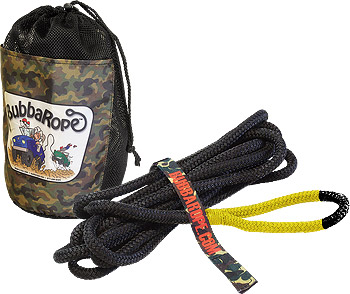
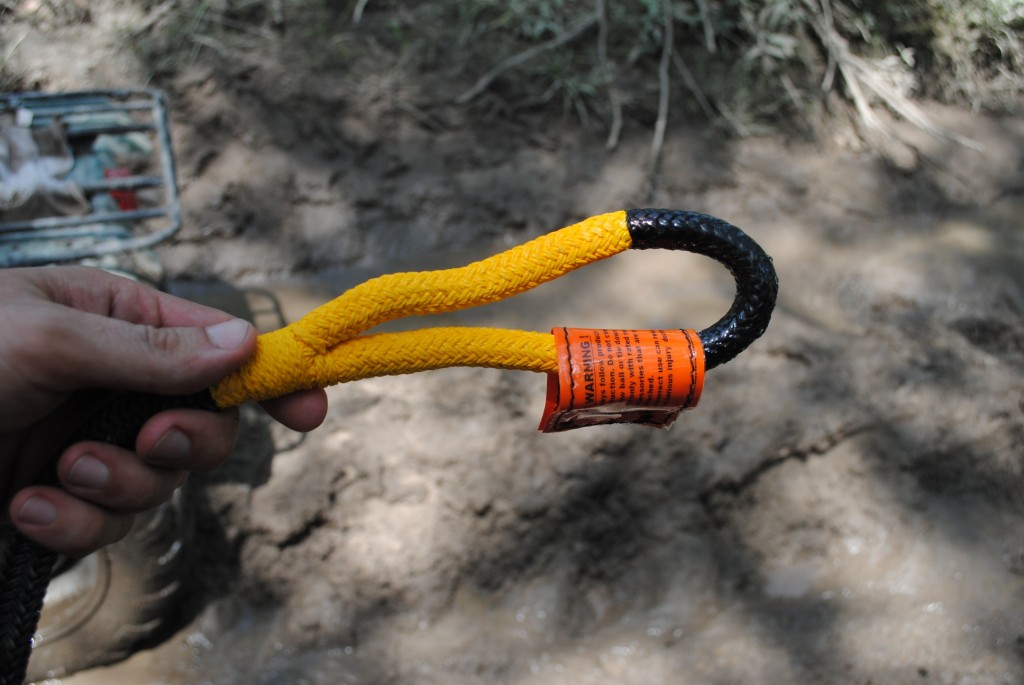
Bubba Rope tow ropes are considered “snatch ropes” because they will stretch and are designed to not just pull, but jerk a stuck vehicle free. This can be especially helpful to overcome the suction effect that mud can have. The elastic also makes the recovery effort smoother for passengers and the vehicles themselves. All Bubba Ropes are made of 100% double braided nylon with a urethane polymer coating. The large loops on both ends are commercially spliced and seized. The ends are then dipped in a high performance elastic polymer coating, a process Bubba Rope calls “Gator-ize.” This coating helps to protect the heavily used loop ends. 

The Lil’ Bubba recovery rope is 1/2″ thick and 20 feet long. It has a breaking strength of an insane 7,400 pounds! That’s way more than enough to get your ATV or side-by-side out of anything. Bubba Ropes have their capacity and other necessary information printed on a label that is attached directly to the rope. Bubba Ropes are also resistant to UV, water and abrasives that are harmful to most tow straps.

We were able to find several testing opportunities for our Lil’ Bubba. Combined with a shackle, the Lil’ Bubba was easier to use than a standard tow strap.  The kinetic energy produced from the jerking motion easily pulled our full-sized ATVs out of the muck. Clean up is as easy as rinsing it off, though don’t expect it to ever look quite as clean as new.

Bubba Ropes come with a strap and a mesh duffel bag for easy carry. MSRP on a Lil’ Bubba is $69.00. The loops, or eyes, of the rope are available in yellow by default. For an extra $20 you can get them in black, orange, green, blue or red. If you tend to get bigger objects stuck they have a rope for that too. Bubba Ropes are available in several diameters and lengths with breaking strengths up to 131,500 pounds.

We’ve all seen the remains of broken ropes and straps around mud holes. Having a Bubba Rope means you won’t have to worry about whether or not you are prepared.

For more details or to purchase see: http://www.bubbarope.com

REVIEW: Moto-Gate Original and Mini

There is no doubt about it, truck beds have been getting smaller. Many trucks are becoming less about hauling capacity and more about being a family vehicle. The increase in cab length has led manufacturers to shorten many truck beds. Closing your tailgate after loading your ATV is becoming nearly impossible with many trucks. This is especially a concern if you need to secure other gear in the bed, like fuel packs, ramps and gear bags. Professional freestyle motocross rider Lance Coury felt the same concerns when he started hauling dirtbikes in his truck. That’s when he developed the Moto-Gate.

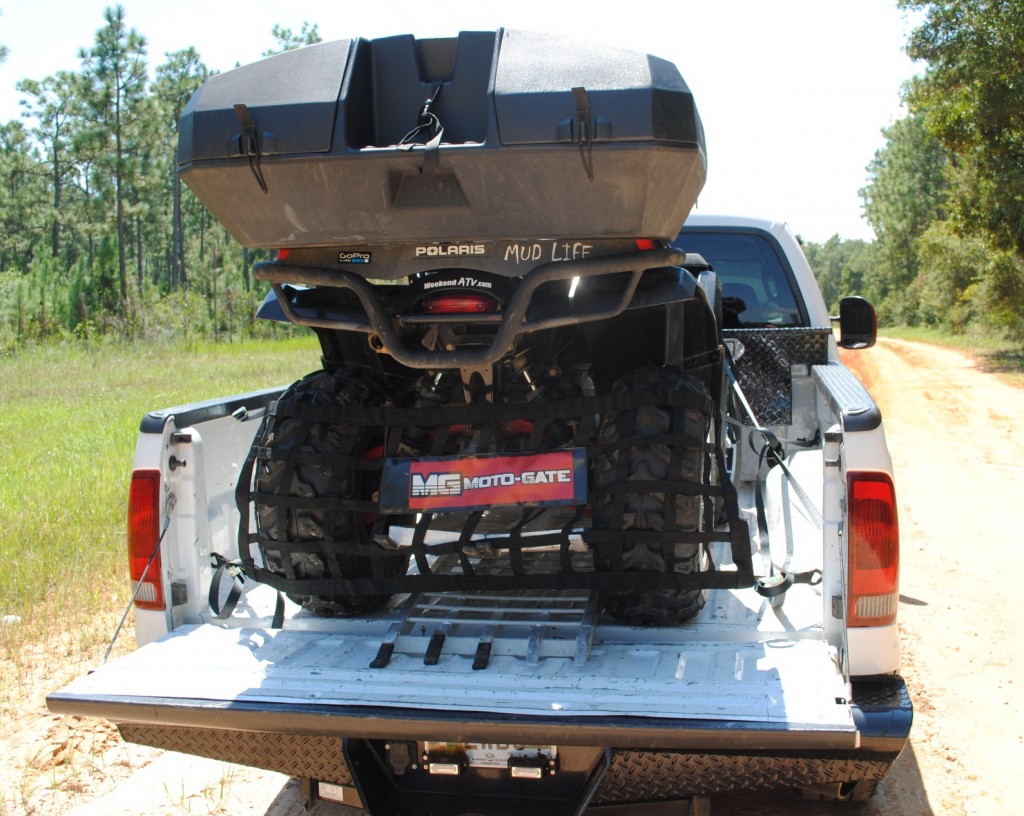
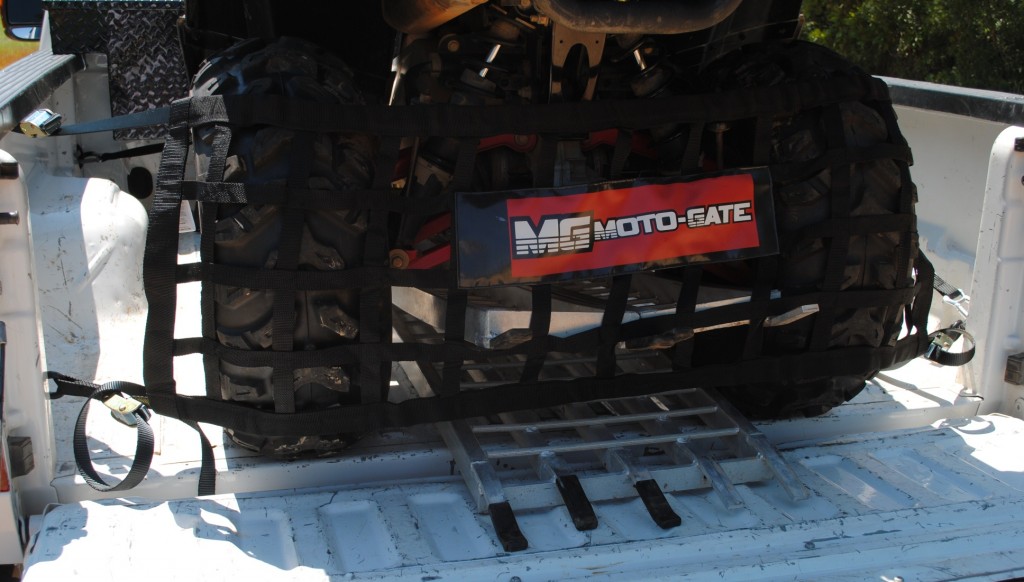
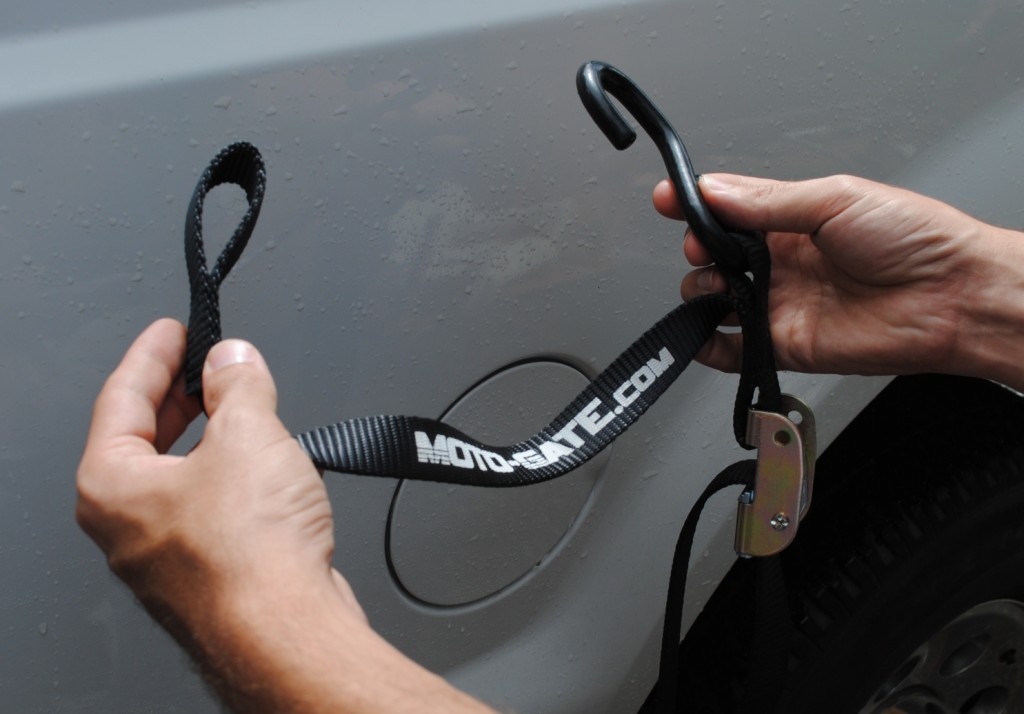
The design is really quite simple. It’s based on a net made of nylon webbing stretched between two tie-down straps. The Moto-Gate Original measures 17 inches by 54 inches. It is secured by straps on each side that adjust from 10 inches to 39 inches long allowing you to reach most any tie point in your truck bed. For smaller trucks the Moto-Gate Mini measures 12 inches by 36 inches with the same 10 to 39 inches of strap adjustment. The end of the straps have rubber coated hooks and the straps are adjusted by weather resistant, spring-loaded cam locks. The Moto-Gate takes less than a minute to install.

The Moto-Gate takes all the worry out of losing your gear on a haul. In particular, we found it to be a great way to keep ramps in place rather than trying to awkwardly tie them down. It also removes any fear of losing fuel cans or other gear.

If you aren’t sold on the Moto-Gate yet, consider that the possible uses expand well beyond hauling your ATV, side by side or dirtbike. Stretched between the four corners of your truck bed, the Moto-Gate can help keep loads from blowing out. The Mini even makes a good tie down system for the bed of a side-by-side.

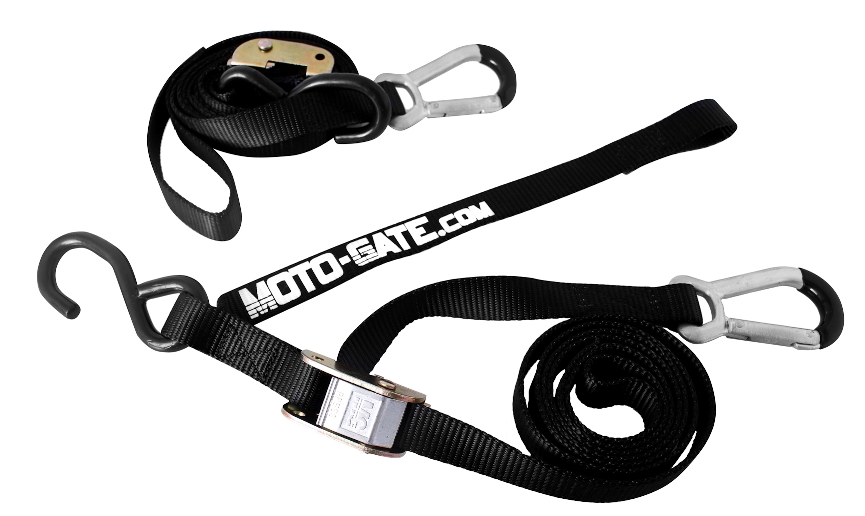
Moto-Gate Tie Downs. Moto-Gate Stock Photo.

While testing out the Moto-Gate we also had a chance to try out the Moto-Gate Tie-Down straps. The six foot straps are great, especially if you are hooking up alone because one end has a carabiner instead of a traditional hook. The other end is specially designed with the offroader in mind giving you the choice of a nylon loop or a hook. The tie-downs feature the same spring loaded cam locks found on the Moto-Gate.

The Moto-Gate is one of those items you look at and say “why didn’t I think of that?”. To that we say thank you to Lance for creating this must-have accessory. The Moto-Gate Original and Mini carry an MSRP of $59.95 each. The Moto-Gate Tie-Downs can be had for $29.95 a pair. Both products have found a permanent place on our toolbox. For more details about Moto-Gate products or to make a purchase, check them out at http://www.moto-gate.com. KTM fans can find a KTM branded version of the Moto-Gate through their product line.


REVIEW: Quadboss Weekender Storage Trunk

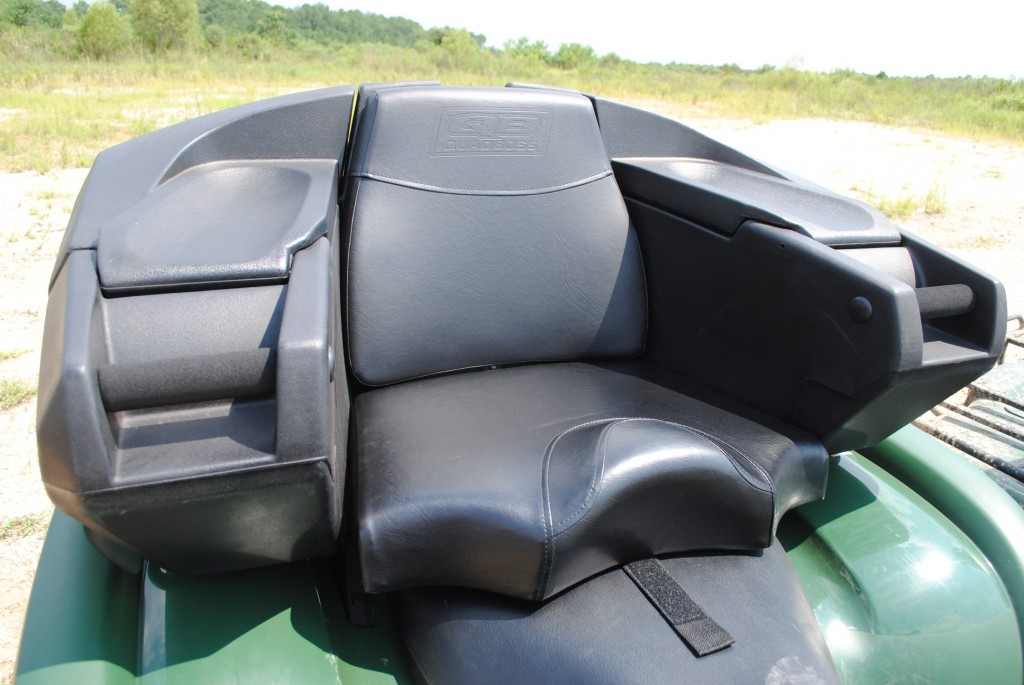
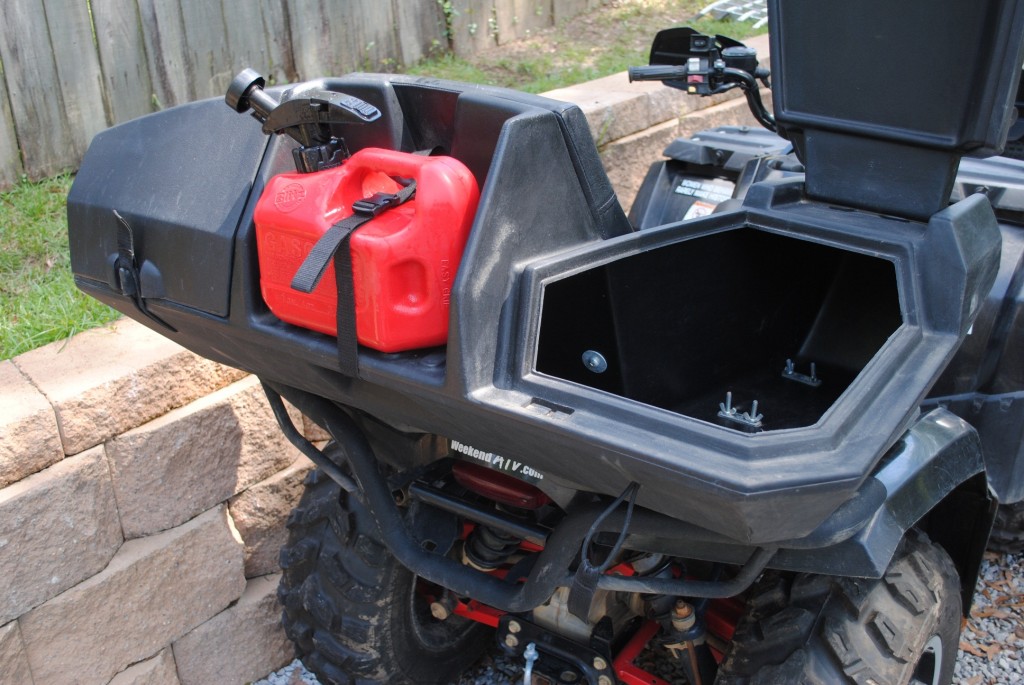
Nowadays you can’t have enough storage when riding long distances. ATV manufacturers have been increasing the amount of dry storage found on most units but sometimes you just need more. There is no limit to the things a rider could or should take. Smart carry-ons include first aid kits, air compressors and tire kits, belts, a jacket, snacks and drinks, tools and any number of items specific to your riding environment and conditions. With the adventures we tend to get into we decided it was time to get one ourselves. We picked up a couple of Quadboss Weekender Trunks at Halls Motorsports in Mobile, Alabama. The Quadboss Weekender is a hard plastic storage trunk. It has a large amount of storage space internally and a shelf on which to strap a small cooler or fuel can. The Weekender also adds a comfortable cushioned seat.

Quadboss Weekender Trunk. Quadboss stock photo.

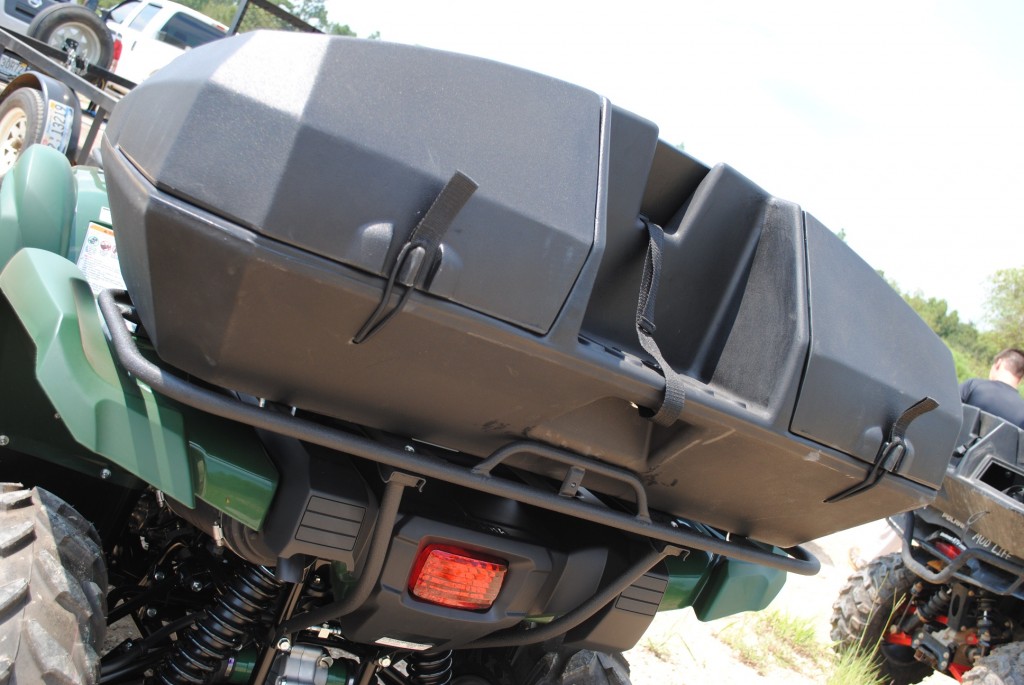
Mounting the trunk is accomplished using four U bolts and wing nuts. It’s designed to be pretty universal so you’ll have to drill your own mounting holes in the trunk. You may find it’s best to remove the rear rack to help make marking the mounting holes easier. We found that mounting it to our Polaris rear rack was a bit of a pain thanks to the Polaris rack design, but it is quite secure once in place. Installation on the Yamaha Grizzly was much easier. Remember to frequently check the wing nuts and tighten them up as needed.
Be sure to check the fit with the driver in place to make sure the trunk is not mounted too far forward. Unfortunately, the Weekender is so long that is can be hard to get proper placement for the driver without modification to the rear rack. In both our Grizzly and Hawkeye installs we found that placing the trunk in front of the lip on the back of the rear rack placed it too far forward to be comfortable for long rides. We cut the plastic lip off the Hawkeye rack. On the other hand, the bottom seat cushion is removable, held in place by just velcro.
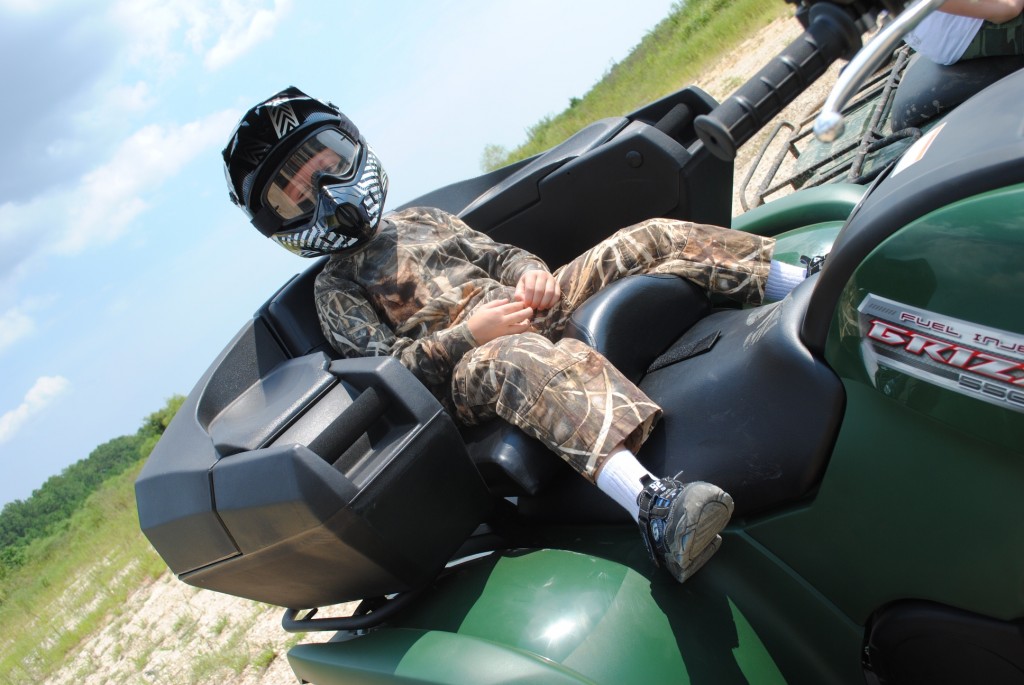
Looking at the Weekender you would expect it to serve as a passenger seat. Afterall, it has plush back and bottom cushions, comfortable hand holds and sits back too far to be used by the driver. However, Quadboss disclaims that it is “not for passenger use while operating vehicle.” I would imagine this is for their own protection from mis-use, improper installation and driver stupidity. Most parks will probably enforce their passenger rules against this seat as well, too. However, there is some level of expectation that it will serve as a passenger seat at times. In controlled tests it worked well, but it certainly pushes a single passenger ATV beyond its designed limits, especially on inclines and sidehills. It makes a comfortable spot for a small passenger, but if your need is to have a place for a constant second rider, there are plenty of 2-up ATV’s that will accomplish this much easier and safer.

Most comfortable seat in the house for sure! Disclaimer: Neither Quadboss nor WeekendATV.com condone using the Weekender as a passenger seat. Always heed manufacturer warnings.

The Weekender opens up on both sides. It opens from the rear so access while seated is a bit difficult. The elastic cords work well for holding the trunk doors closed. The openings measure (get measurements). It’s not quite big enough for most adult sized helmets, but youth helmets will fit inside nicely. It would have been nice if they had included padlock holes so you could lock the trunk. The design of the openings is pretty water-resistant thanks to the lip it has. It would be easy to add a little foam water-proofing strip to the edge if you need.

The Weekender has a textured finish that helps keep scratches from being too visible. This is especially good on tight trails. The size of the Weekender makes it as wide or wider on some ATVs, and you may find that it gets hung up on branches and vines that the ATV itself easily clears.

Overall, the Quadboss Weekender Trunk is a solid accessory. An MSRP of $333.99 may be a little steep for a plastic box, but its pretty well inline with other industry-specific offerings. Dealers should also be able to provide a full line of replacements parts. This may come in handy if you forget to remove the seat cushion before heading down the highway. And no, we haven’t had that happen yet.

To find a Quadboss dealer near you or to see other trunks they offer check out the Quadboss website at http://www.quadboss.com. If you are on the Gulf Coast check out the Hall’s Motorsports locations at http://www.visithalls.com.

REVIEW: HJC CL-X6 Helmets

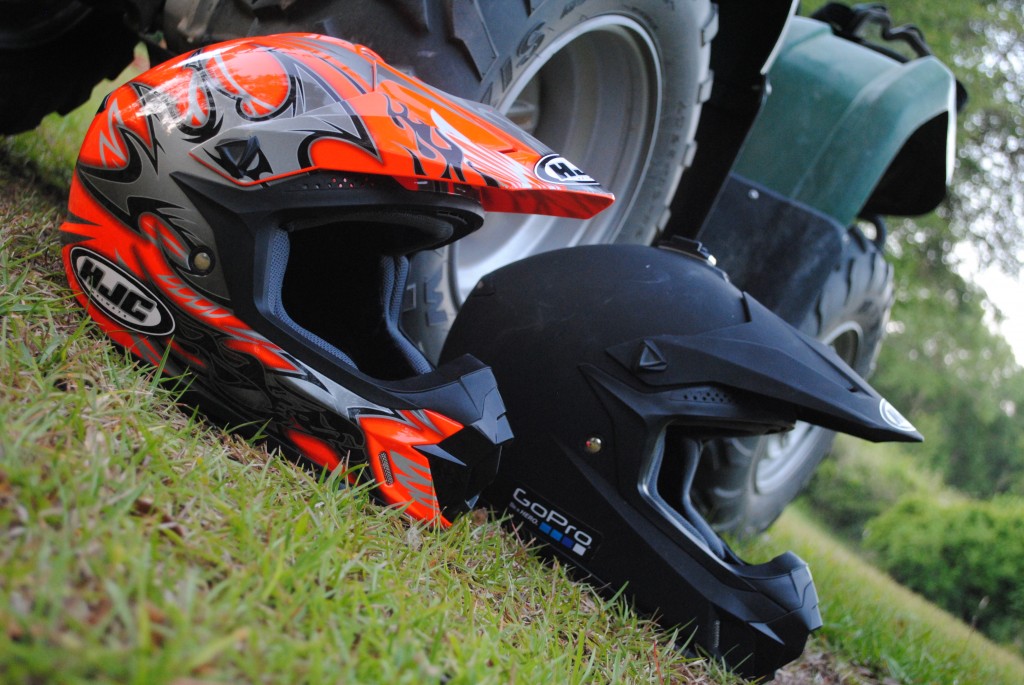
Some people are just too cool for helmets. No argument, we still feel right at home without ours on. But we have also watched some pretty bad stuff happen to people who were completely in control of their ATVs, so we have been forcing ourselves to wear them. Even disregarding personal safety, there will surely come a time when you will want to ride at an ATV park that requires helmets. In preparation for such a park trip, Neecy and I picked up a pair of HJC CL-X6 helmets from Hall’s Motorsports in Mobile, Alabama. There were plenty on display so we were able to find the best size for each of us. The staff at Hall’s Motorsports was able to make recommendations regarding helmet sizes for our quickly growing daughters too. The sizes range from XS to 3XL, but an in-store fitting is your best bet to ensure an accurate fit.

While you may not consider HJC to be one of the elite names in helmets, they have plenty of experience, having been in the motorcycle helmet industry since 1971. According to their own website they have been the #1 selling motorcycle helmet manufacturer in the United States since 1992. The helmets are manufactured at three different plants in Asia.

The CL-X6 is the choice mounting location for our GoPro HD Hero2 cameras.

We found the helmets to be quite comfortable and not too heavy, even after a full day of riding. They also provide adequate dust protection for the mouth and nose. After a couple of riding trips I removed the cheek pads and sent them through the washing machine and a good air dry. The rest of the helmet cleans up easily with a damp cloth and a little soap, if needed. They both still look great. We’ve been using our CL-X6 helmets for about 7 months now and are very pleased with our purchase. Each new HJC helmet comes with an extra nut for the visor, a storage bag and instructions for proper wear and care.

      The CL-X6 line comes in 8 different graphic styles with several color choices of each for a total of 27 different helmet looks. MSRP for the helmets ranges between $119.99 for the solid colored helmets to $154.99 for the most graphically intense series. You can view this and other helmet lines from HJC at www.HJChelmets.com. The site also has a dealer locator to help you find the nearest retailer including the many locations of Hall’s Motorsports.

REVIEW: RotopaX Gasoline Fuel Pack

Being as enthusiastic about our industry as I am, I am an avid reader of some of the great magazines available for ATVs. As such, I was disturbed to read a recent review where Kolpin’s Fuel Pack JR was given a 5 star rating despite leaking fuel from the seal while riding. Now I have bought plenty of $5 hardware store fuel cans that leaked around the spout, granted I also got what I paid for….a $5 fuel can. However, if I am paying $50+ for a fuel pack designed for ATV riding, then I expect it to hold all the fuel in. I was determined to find a real 5-star winner when I found RotopaX by GREAT Outdoor Products LLC. I got in touch with Jason at RotopaX and ordered the new 1.75 gallon gasoline pack to try out.

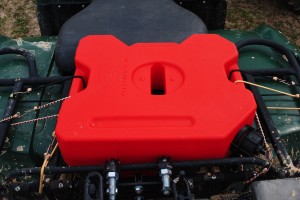
RotopaX 1.75 Gallon Gasoline Pack – RotopaX stock photo

Right out of the box the RotopaX fuel can feels tough. The shell is obviously thicker than fuel cans you’ll find at your hardware store. This is thanks to a rotational molding process used to manufacture them. This process is more costly that traditional blow molding, but creates a higher quality product as is evident with the RotopaX units. RotopaX also provides several secure mounting options that lock the pack down through the mounting hole found in the center of the pack. There are several variations including one that locks to prevent theft.

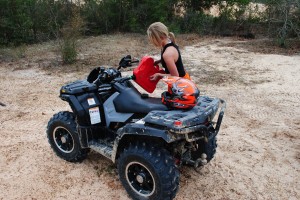
We rode all day without the least bit of fuel loss at the spout, even with the tank laying down.

During a recent day trip I had the RotopaX fuel pack straped horizontally on my rear rack. It was full of fuel and I wanted to give it every chance to leak. Through trails, mud and bouncing through sand dunes the RotopaX never lost a single drop of fuel. It held up incredibly well through some of the most aggressive terrain I could put it through. I felt this was especially important after the Kolpin review. How can a fuel pack get 5 stars when it leaks? Sounds like 2 stars to me. RotopaX is your 5 star winner.

Like an extra life in a video game, playtime has been extended!

RotopaX has a full range of sizes. They also make the mounts in various colors designed to specify contents like diesel, kerosene, water, etc. The packs are also EPA and CARB compliant. They also have emergency preparedness and empty storage packs.To check out their full offerings visit them at http://www.rotopax.com or call them at 801-299-1885.

REVIEW: D&G Enterprises Tool Rack

A year or so ago I stumbled across an ebay auction for a homemade tool rack. The small setup was designed to hold a couple of tools like a shovel and axe as well as a fire extinguisher. I liked the idea and convenience and since the price was right I ordered one. It had a couple of universal mounting options and I found the one that best mounted to my rear rack. It has proved invaluable over the last year and has recieved many comments and compliments.

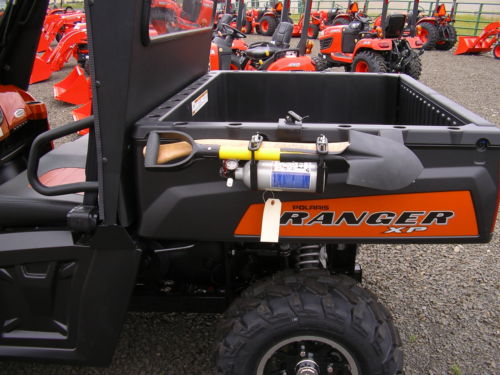
Polaris Lock and Ride Install. D&G Enterprises Stock Photo.

I looked up the same rack again a couple of months ago and found that the seller had created a new and improved version. I immediately got in touch with Dave at D&G Enterprises to see the new system. Dave is an experienced metal fabricator who came up with the rack idea to comply with his local riding requirements during fire season. Dave shipped out my new rack and when it arrived it was out with the old and in with the new.

Universal fit usually means it kinda fits everything, but doesn’t fit anything well. D&G Enterprises has done a great job of overcoming this issue by providing several different mounting options. When you order one you can specify bar mounts for a 3/4 inch bar, a 1 1/2 inch bar or an L bracket. The 3/4 inch bar mount will fit most standard ATV racks. The 1 1/2 inch bar mount is a good fit on side by side roll cages. The L bracket works great for the Polaris Lock and Ride system. The unit could also be bolted directly to storage boxes or other scenarios as appropriate. The rack itself is welded steel. The rack and mounting hardware are laquer finished and the tool mounts are rubber coated. I have seen some rust spots in places where the laquer has been scratched, but that’s no different than the luggage racks and bumpers on most quads.

A D&G Enterprises Tool Rack with all mounting options. You’ll need to pick the best one for you.

For tool mounting there is a designated spot to hold two tools horizontally. It’s perfect for a small shovel and axe. Other tools may make sense for your own adventures. The tools are held tightly in place by two plastic finger nuts. The fire extingusher is held into place by a spring-loaded bar. You simply compress the spring and turn it out of the way. The extinguisher slides right out of the bracket and is ready for use. It takes only a couple of seconds to remove the extingusher.

A loaded D&G Enterprises Tool Rack

Certainly there are benefits to having tools on the trail. Shovels can be used to dig you out of certain situations. They can also be used as a winch anchor if there is nothing else around. Having a fire extinguisher can help if an ATV overheats or a campfire gets out of control. There are many OHV parks that actually require them to be carried on ATVs. The D&G Enterprises Utility Rack makes hauling these tools convenient without taking up valuable rack space. At less than $40 the unit is well worth it. Pick one up for yourself at http://www.ebay.com/sch/thewilliesman/m.html?_nkw=&_armrs=1&_from=&_ipg=&_trksid=p3686

REVIEW: GoPro HD Hero2 Camera


Social media is everywhere. Everyone wants to share the cool stuff they are doing with status updates, check-ins, photos and more. But there is no better way to brag about your awesome adventure than capturing it in true high definition video. Enter the GoPro HD Hero2 camera.

GoPro is no newbie to video capture. The HD Hero2 is the third camera release from the company, building on each one to produce a more feature rich product each time. We decided the HD Hero2 would be the perfect tool for the staff here at WeekendATV.com to use for future reviews so we picked one up amid the holiday shopping excitement. After a few rides we are not disappointed!

First and foremost the HD Hero2 is a video camera. It is capable of videos modes in WVGA, 720p, 960p and 1080p. Each has multiple FOV (field of view) settings and FPS (frames per second). The still camera mode is pretty impressive too putting out 11 megapixel images. There are also some awesome still shot modes, like taking 10 photos in one second or taking a picture every half, 1, 2 ,10, 30 or 60 seconds. The lens design gives a fisheye effect to pictures and video.

Perhaps the biggest seller for those of us that get muddy is the camera is completely waterproof down to 197′. I don’t think there is an ATV snorkel kit yet that can test that so it should handle your riding grounds. There are also multiple mounts for the camera system so it can get almost any point of view you can imagine. There is a helmet mount, a handlebar mount, a rollbar mount, adhesive mounts and many others to cater to both our industry and others.

In our own tests we found out one thing quick. That old SD memory card you have laying around is not going to cut it. For good video quality you’ll need a Class 10 SD memory card as recommended by GoPro. Also, our test days all turned out to be cool, overcast days in the humid deep South. We found that the outer skeleton lens would fog up over time leaving our picture very cloudy. If we opened case the moisture disappeared immediately. GoPro apparently saw this issue and sells strips that help absorb the moisture.

The final result is an awesome piece of hardware. At an MSRP of $299 the GoPro HD Hero2 is perfect for capturing all of your adventures at a  more than reasonable price, Also surprising is the reasonable price for the different mounts. Overall expect your investment to be around $400 between the camera, SD card and a mount or two.  You won’t regret it. For more information visit GoPro at GoPro.com. Stay tuned to WeekendATV.com for a lot more videos made with the GoPro HD Hero2.

REVIEW: Cycle Country CV Boot Guards

It doesn’t take too long to learn that CV joints and boots need a little extra protection. They aren’t particularly cheap or super easy to replace, but they are often susceptible to damage. Rubber boots are easily pierced by debris on the trail allowing mud, dirt and water to penetrate the CV joints. The older the boots are the more brittle they will become. Neecy’s Polaris Hawkeye 4×4 suffered two blown CV joints within a couple of months. We replaced them with new Monster Axles, and it was was time to protect that investment with a set of CV boot guards.

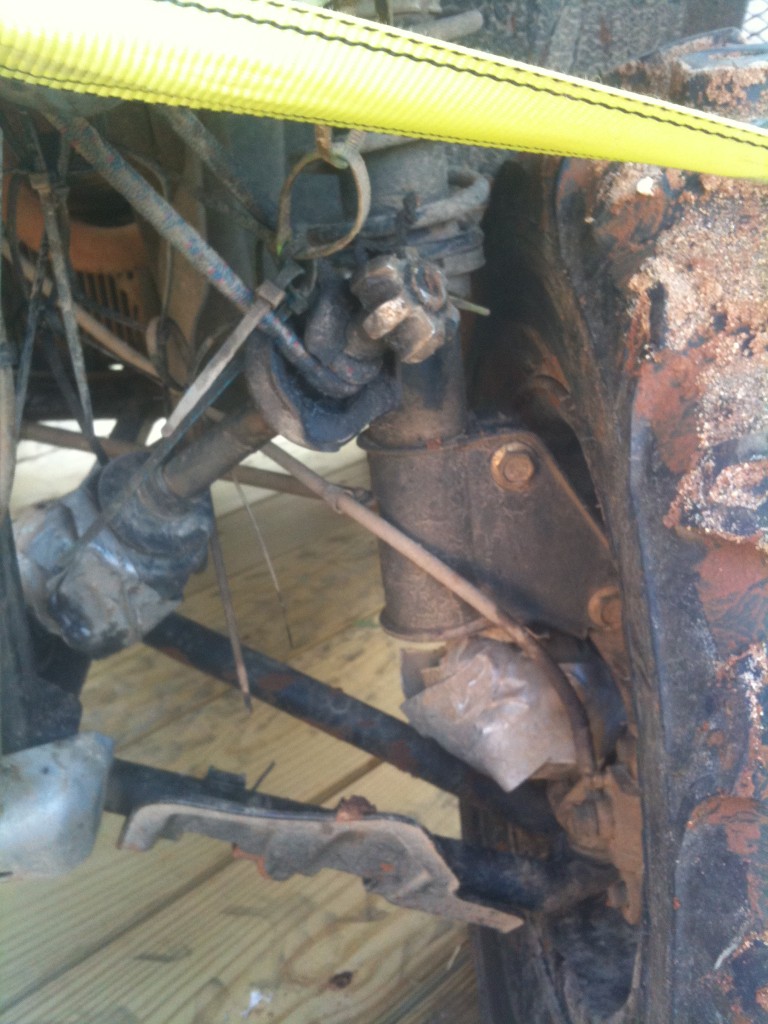
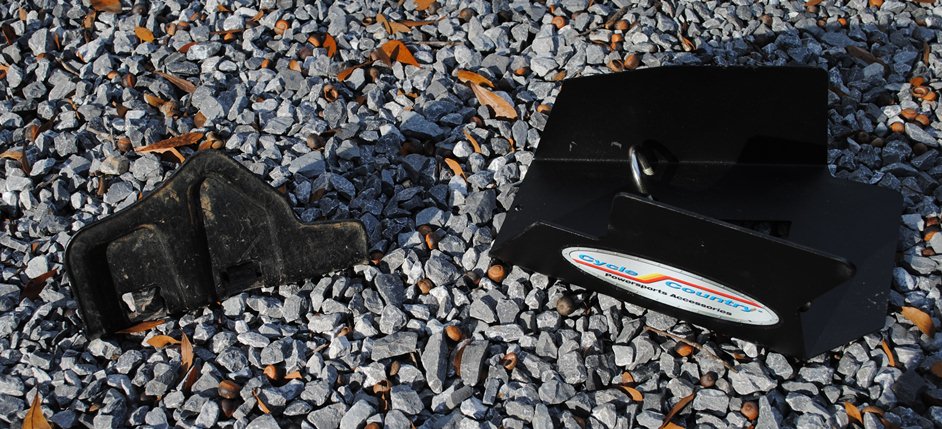
Failed CV joint, causing the entire axle to come loose. We tied it out of the way with a bungee cord to finish the ride.

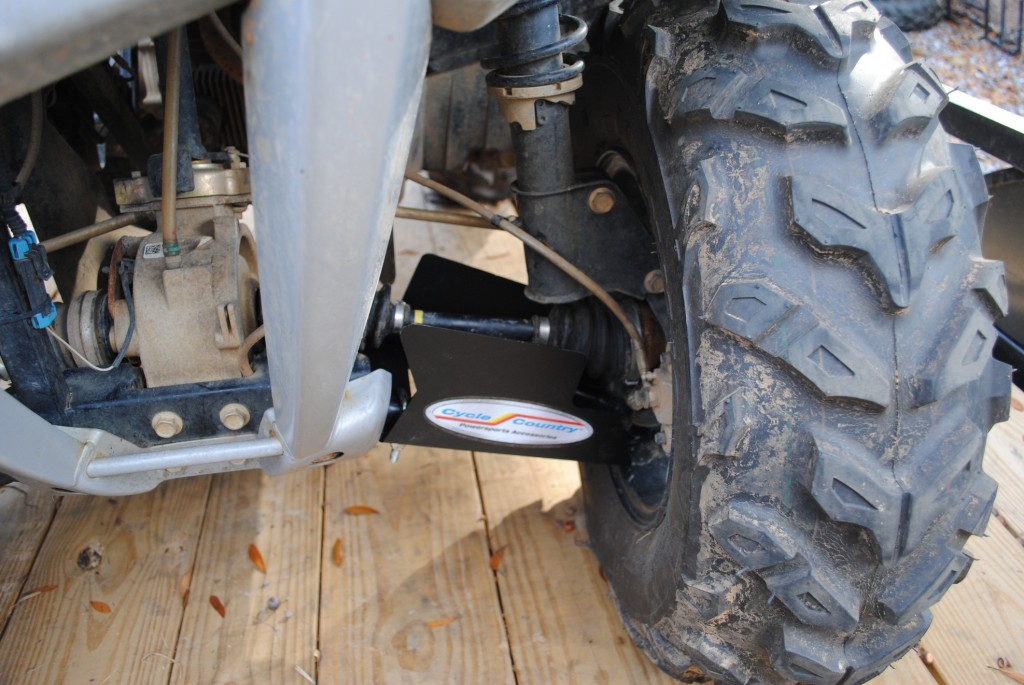
I picked up a set of Cycle Country CV Boot Guards (sometimes referred to as A-arm guards) off ebay. They are also are available from many retailers. The guards are very solid, made from 12 guage steel and finished with a powder coating. Not only will they protect the boot and joint, but it will also help protect the A-arm itself from damage. It is a huge upgrade from the flimsy stock plastic found on the Hawkeye from the factory.

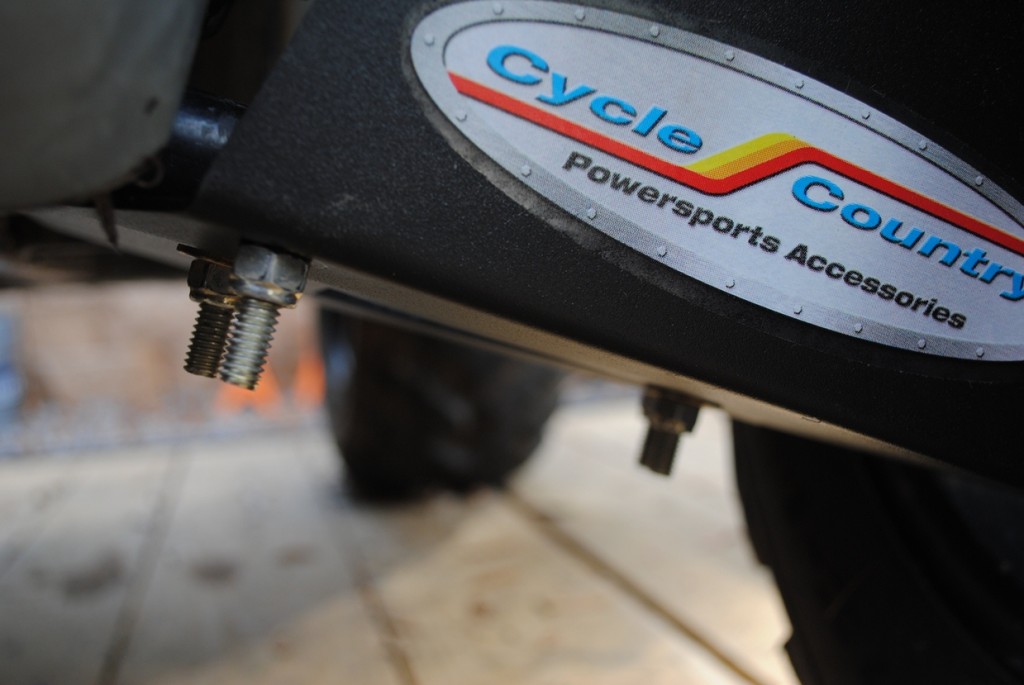
The Cycle Country guards were super easy to install. For the Hawkeye, start by removing the two screws holding the factory guard in place. Then remove the factory guard. Next place the Cycle Country guards under the A-arms and bolt them into place with the U-bolts. As the bolts tighten up make sure the guards are in the proper spot. The guard should not come into contact with any part of the frame, bumpers, wheels or tires while stationary or while riding. Once you finish tightening them you’ll need to cut off the excess bolt sticking out below so they don’t catch on anything. After a short ride recheck the position of the guards. Readjust and tighten as needed. Checking the position of the guards should be a part of your regular maintenance plan.

Now your ride is much better protected from costly damage that can easily be found on the trails. Prices vary by application. Rear guards are also available for many applications. For more information, including a fitment chart and other accessories, see Cycle Country at http://www.cyclecountry.com.

REVIEW: RAM Mounts Aqua Box

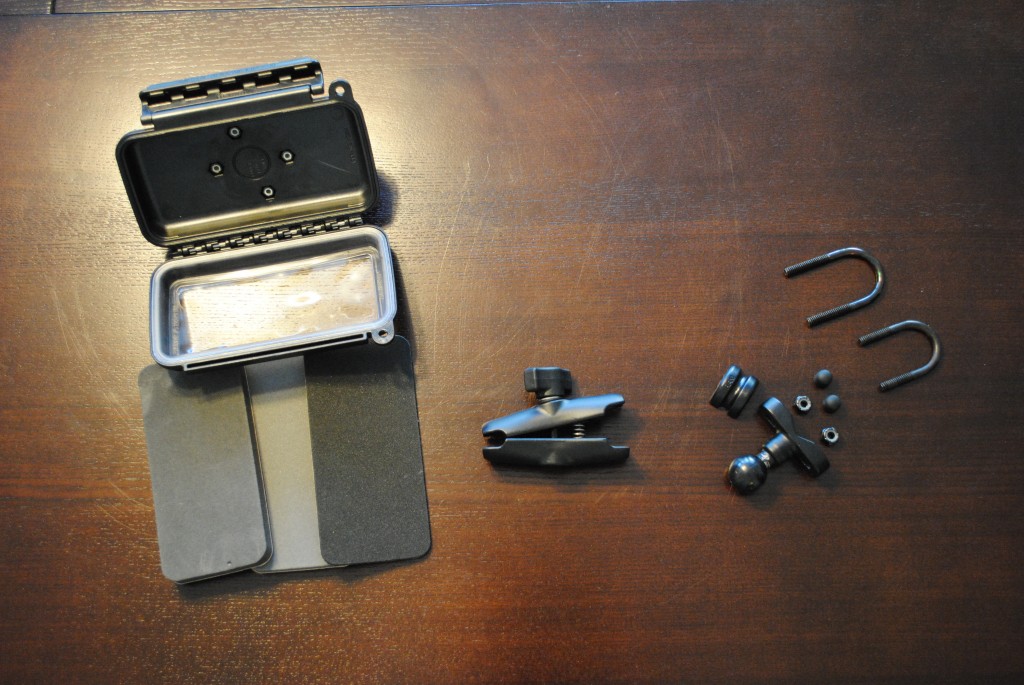
Cell phones are a crucial item for most everyone. Trail riding is no exception to this. There have been many times when my trail buddies were trying to call me and the calls went unnoticed while I was bounding down the trails. So I was super excited to pick up a RAM Mounts Aqua Box. I have used RAM Mounts equipment in vehicles so I was familiar with the quality. I ordered the RAM-B-149Z-AQ2U from GPSCity.com. The kit contains three separate items: a handle bar mount, arm and a Medium Aqua Box. According to RAM, the internal dimensions of the medium box are 2.88″ wide, 5.75″ high and 1.188″ deep. Three foam pads of different thicknesses are included so your device is well secured inside the box. Alternative kits are made with smaller or larger Aqua Boxes. I found the medium sized Aqua Box to be perfect for my Apple iPhone 3GS in its OtterBox Defender case.
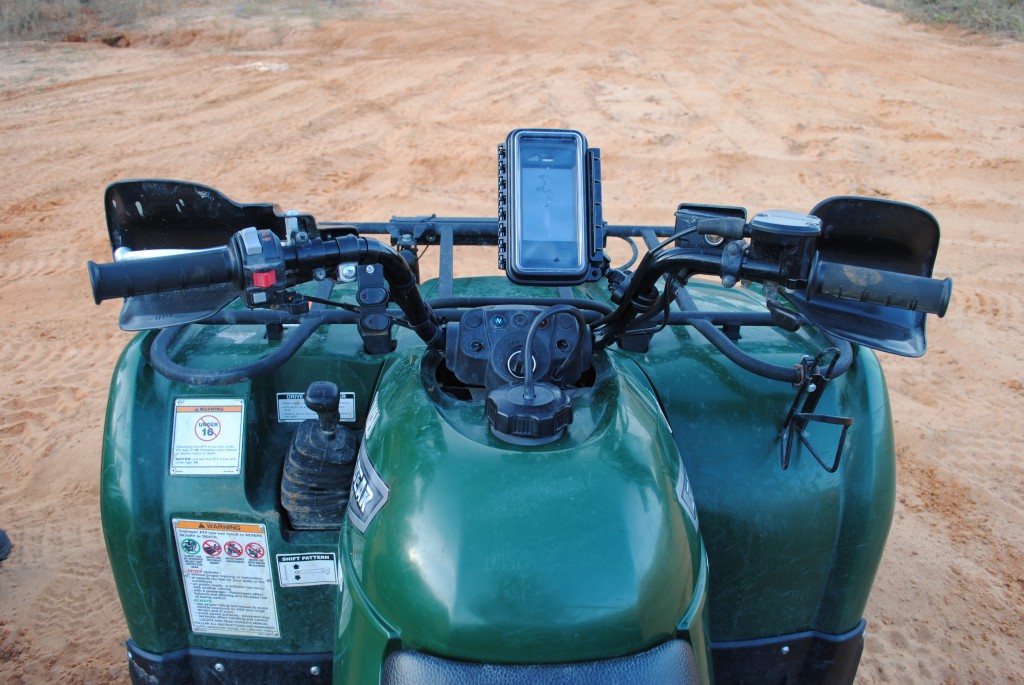
Ram Aqua Box Break Down     Assembly is a snap and took less than 10 minutes. The flex lens is not hard to install but it seems a bit awkward at first. RAM offers a video on their website to clear up any confusion. The ball joint system that RAM uses makes mounting extremely flexible. The kit includes mounting hardware for different sized handlebars.  The box is waterproof and though you can’t fully use the iPhone touchscreen through the Aqua Box flex lens, you can easily see calls and messages when they come in. Simple screen touches work fine but sliding functions do not work. The box also has a punchout that can be used to route wires from the device. The case design should maintain its water tight abilities even with this option used.
Ram Aqua Box Mounted     During an hour long trail ride, there was no movement at all from the RAM system. It held solidly in place and the safety of my iPhone was the last thing on my mind. I did panic a time or two when I realized my phone was not in my pocket, thinking it had fallen out while riding. I was quickly reassured to see it staring back at me from between the handle bars. I consider this a must have add-on for any trail rider and I will be adding it to my other quads. MSRP from RAM Mounts is $68.92. The system is covered by a lifetime warranty with the exception of the replaceable flex lens. Lenses are about $5 from RAM. You can see this and their other offerings at http://www.ram-mount.com/.


Protect your smartphone with an OtterBox!