REVIEW: Dragline Offroad SynthShackles

At WeekendATV.com we are constantly scouring the industry for products to make our offroad experience better. Sometimes we are looking to fill a void or improve a process. Other times we are just looking for unique products that you may never have heard of before. Recently, we were in need of new recovery shackles and stumbled across a product that fits all of the above: the Dragline Offroad SynthShackles.

Dragline Offroad SynthShackle

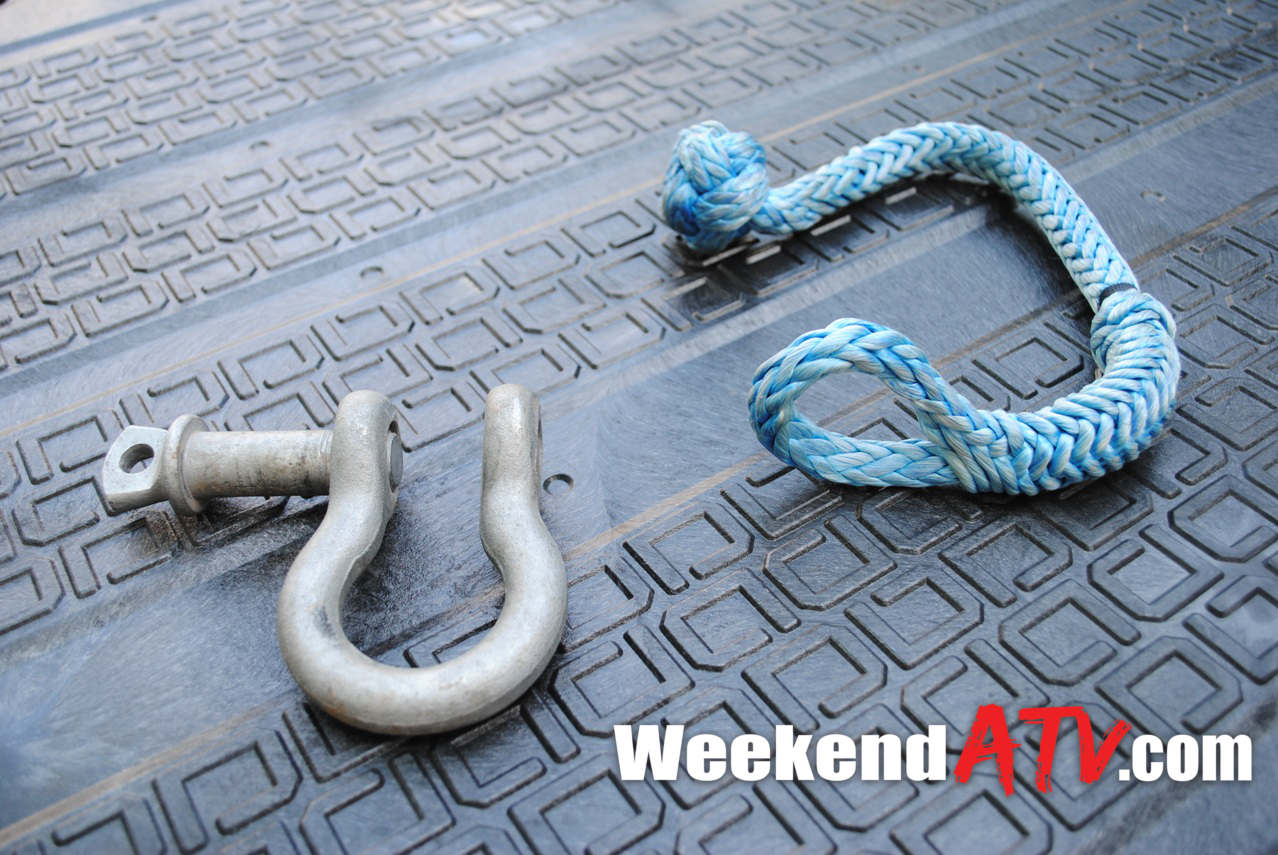
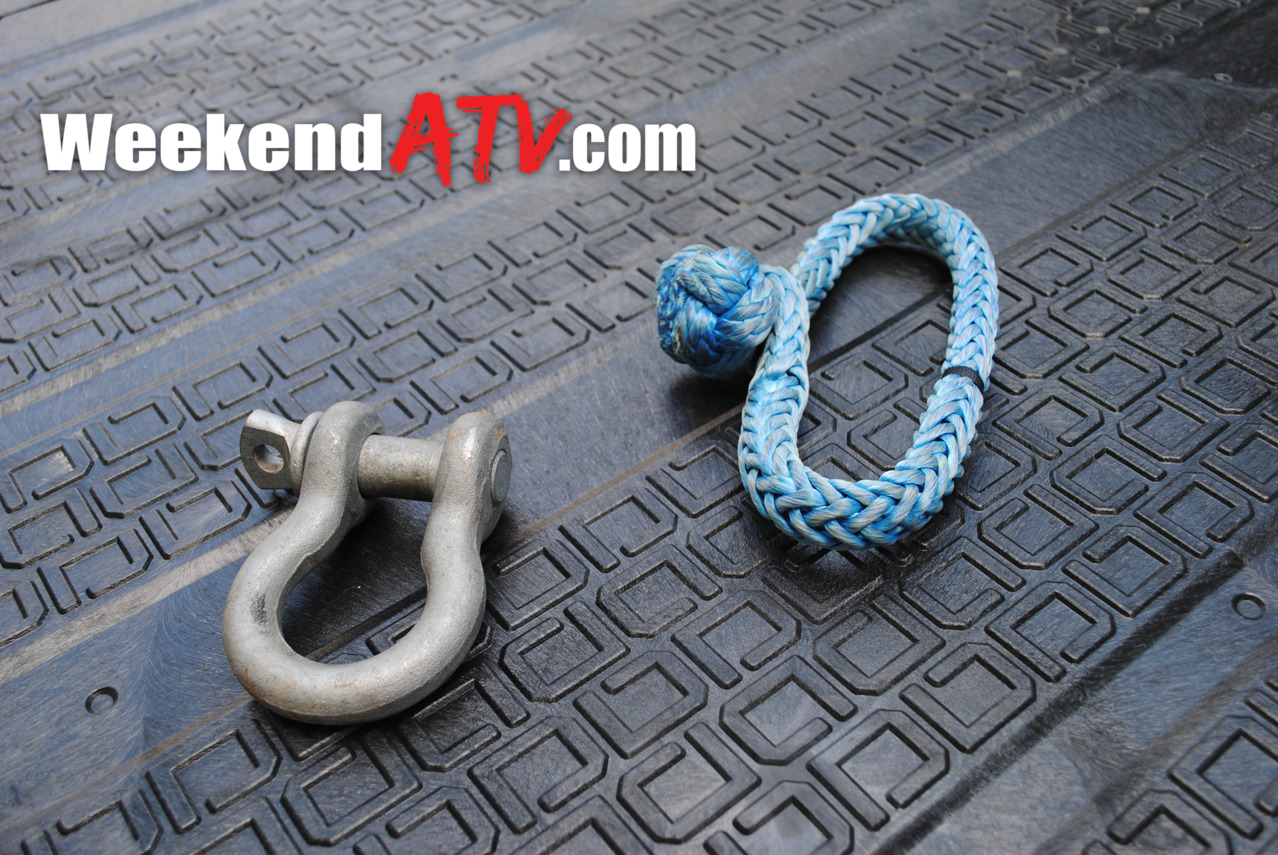
Dragline Offroad SynthShackles are made from HTS-78 Dyneema in a 12 strand open weave construction. HTS-78 Dyneema is an ultra high molecular weight polyethylene or UHMWPE. Synthetic rope has become a common winch upgrade and can even be found standard on some premium winches. HTS-78 Dyneema is a great fiber for use in off-road recovery because of it pliability and strength.

Dragline Offroad SynthShackle

The Dragline Offroad SynthShackles offer many benefits over traditional metal shackles. First, they aren’t susceptible to rust or corrosion and there’s no need to worry about seizing or binding of the pin like a traditional shackle can under pressure. If the threads on a shackle get damaged it’s trashed. It floats if you drop it in water or mud trying to get it hooked up. Ever tried digging a metal shackle out of the mud? It doesn’t get too hot or cold to handle based on the elements. And from a safety perspective, if the shackle were to break under pressure it will simply fall to the ground rather than sending dangerous shrapnel at you or your ride; just like a synthetic winchline.

Dragline Offroad SynthShackle

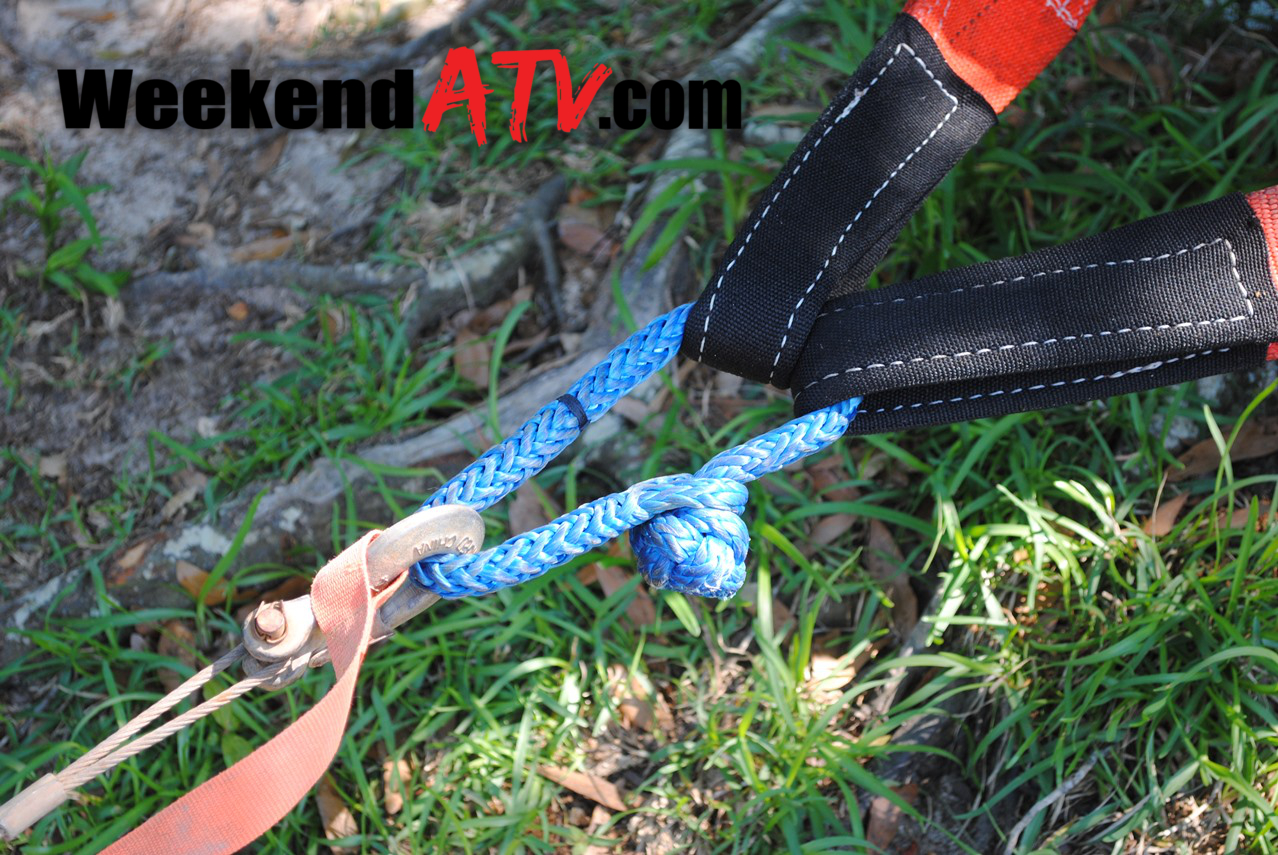
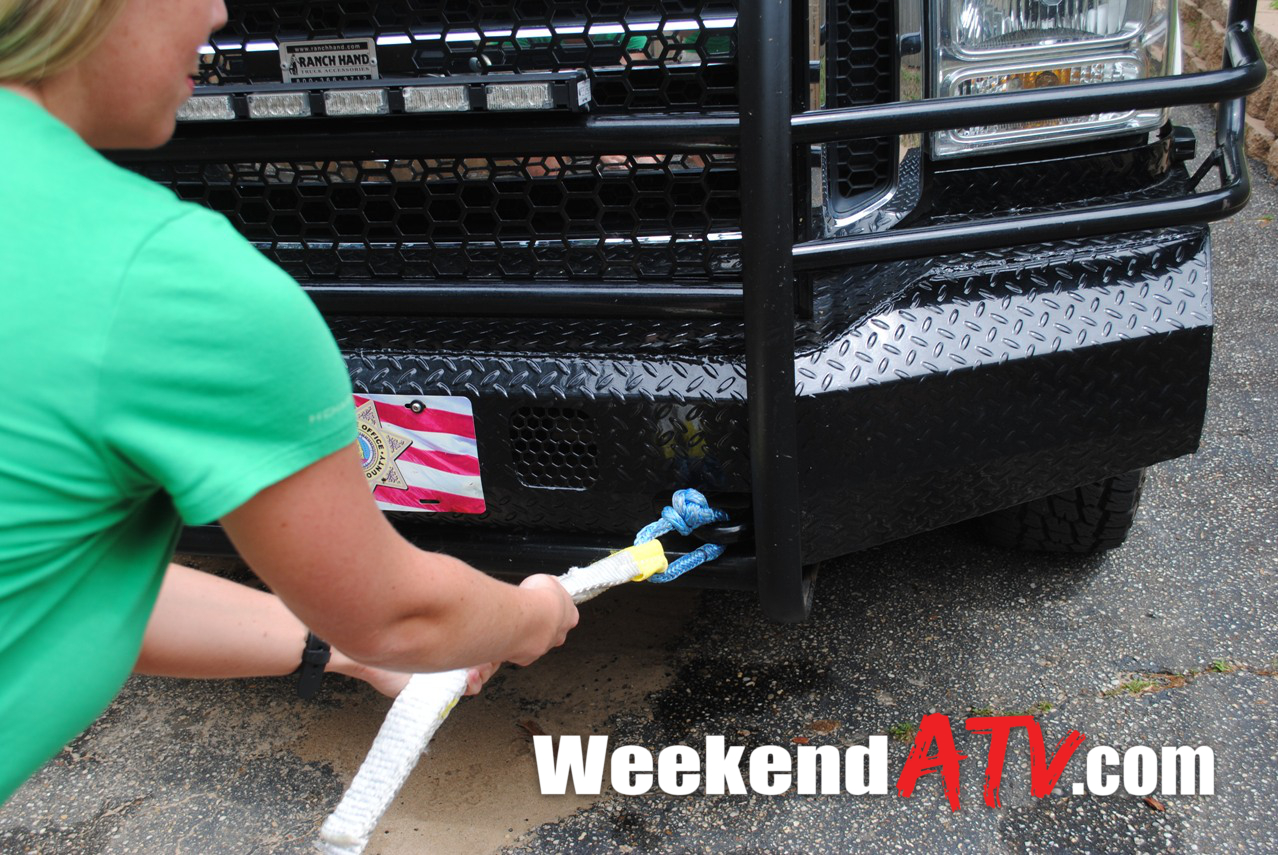
To test this synthetic shackle idea Dragline Offroad sent us their standard Recovery SynthShackle. The Recovery SynthShackle has a minimum breaking strength of 18,800 lbf. The shackle is incredibly easy to use. Simply push back on the slack to create a loop big enough to fit the knot through. SynthShackles are not for use on clevis mounts found on many bumpers, but they are a perfect and convenient link between your standard shackle and winchline. It also won’t scratch your paint like a metal shackle.

Dragline Offroad SynthShackle

Our Dragline Offroad SynthShackle retails for $36.99 as tested. They also have the XL Recovery SynthShackle (rated at 24,000 lbf for $79.99) and the HD Recovery SynthShackle (rated at 34,400 lbf for $54.99). Dragline Offroad also carries synthetic winchlines and a synthetic snatchblock we’ll get our hands on soon. To check out their full line and order your own see http://www.draglineoffroad.com.

REVIEW: Ricochet Offroad Armor Skid Plates

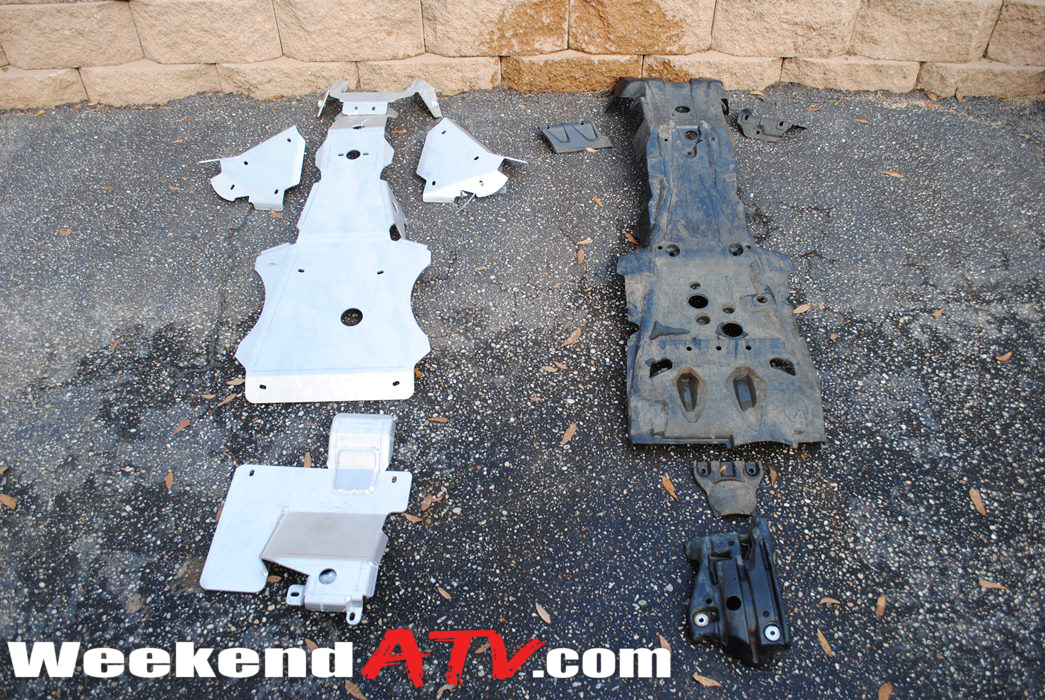
Like any new ATV owner, we want to protect our investments and make sure they last as long as possible. So we were very excited to see the team at Ricochet Offroad Armor had released a full protection kit for the 2014 Honda Rancher 420. Since Honda has the Rancher sporting a new frame the Ricochet team had to go back to the design phase and update their catalog. The end result is a seemingly bullet-proof set of Ricochet Offroad Armor Skid Plates.

The complete protection set from Ricochet includes a full frame skid plate with bash plate, A-Arm guards and a rear diff skid plate. This means that basically everything on the bottom of your ride is protected from the worst terrain you can find. The kit is made of 3/16″ 5052 H-32 Aluminum. The included mounting hardware is mostly zinc plated T40 Torx bolts and unique clamps to hold everything to the frame. The complete set for the Rancher weighs in at 20.3 pounds.
Ricochet Skid Plates

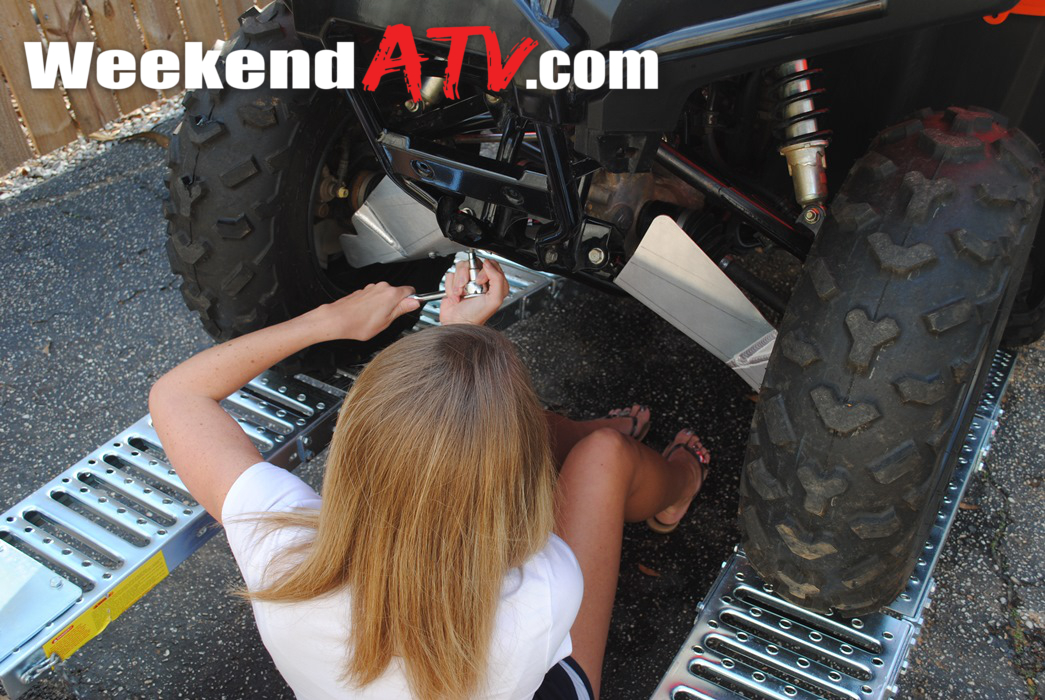
Installation is very easy. We ran our Rancher up a set of ramps on a retaining wall. You could also stand it up on the back tires and rack. Whatever you choose to do make sure you secure it to keep it from falling. The first step is to remove the plastic guards that your ride came with. You may appreciate your manufacturers efforts to keep cost and weight down but you won’t be impressed by their end result. It’s time to, as Ricochet says, “Armor Up!”

Ricochet Skid Plates

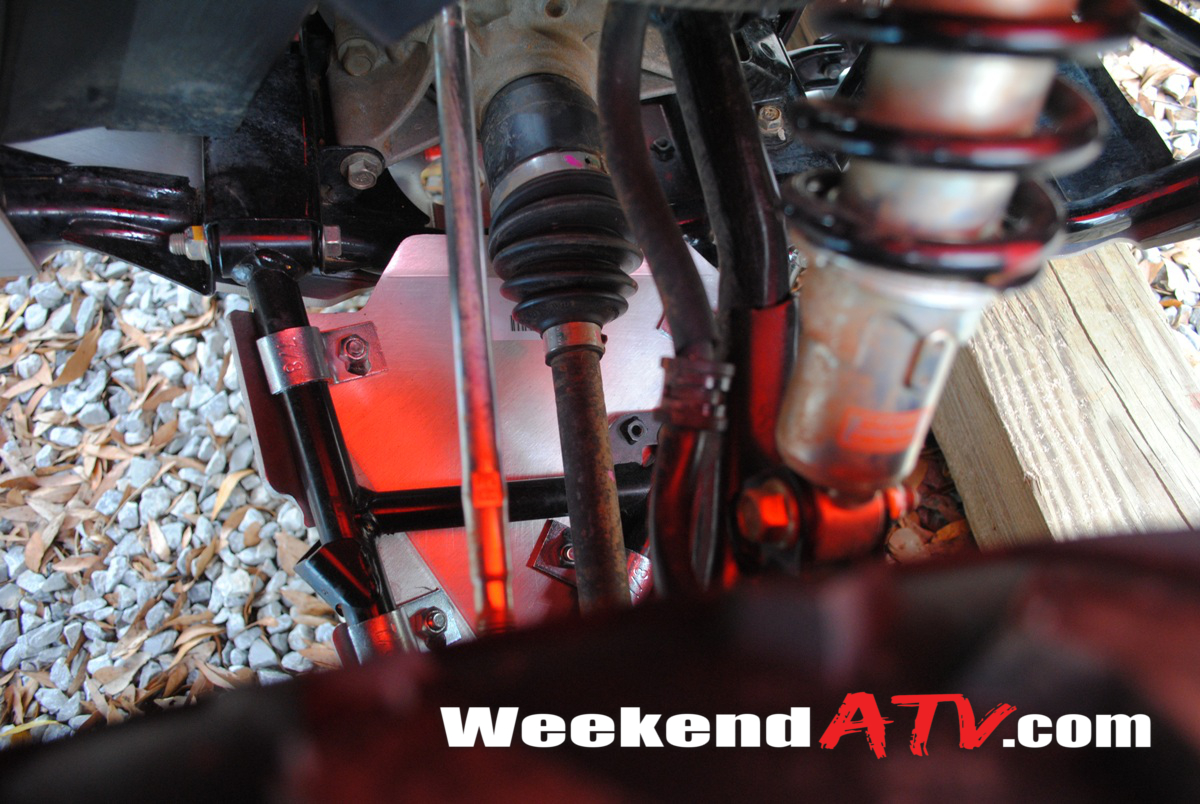
We started with the A-arm guards. The guards are held on by 3 clamp fittings over the A-arms. The clamps for your installation will vary based on the best fit for where on your frame they are going. With the A-arm guards be sure that you leave them loose to start so you can make the their placement is perfect. Too far in or out may cause undesired rubbing against your frame or wheels.

Ricochet Offroad Armor Skid Plate

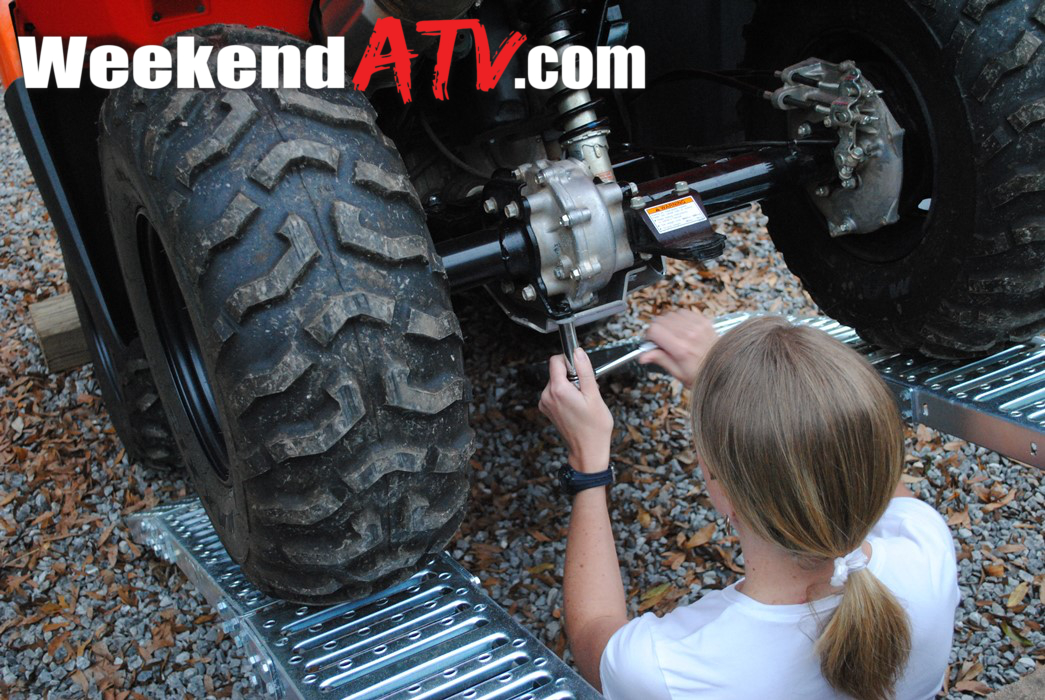
Next we moved to the full frame skid plate and bash plate. The skid plate also attaches primarily with clamps. Install it first and then the bash plate over it. You’ll noticed the round head Torx bolts will hit a lot less than a standard bolt head or nut like the U-bolts found on other kits. The final piece is the swing arm/rear differential plate.

Ricochet Skid Plates

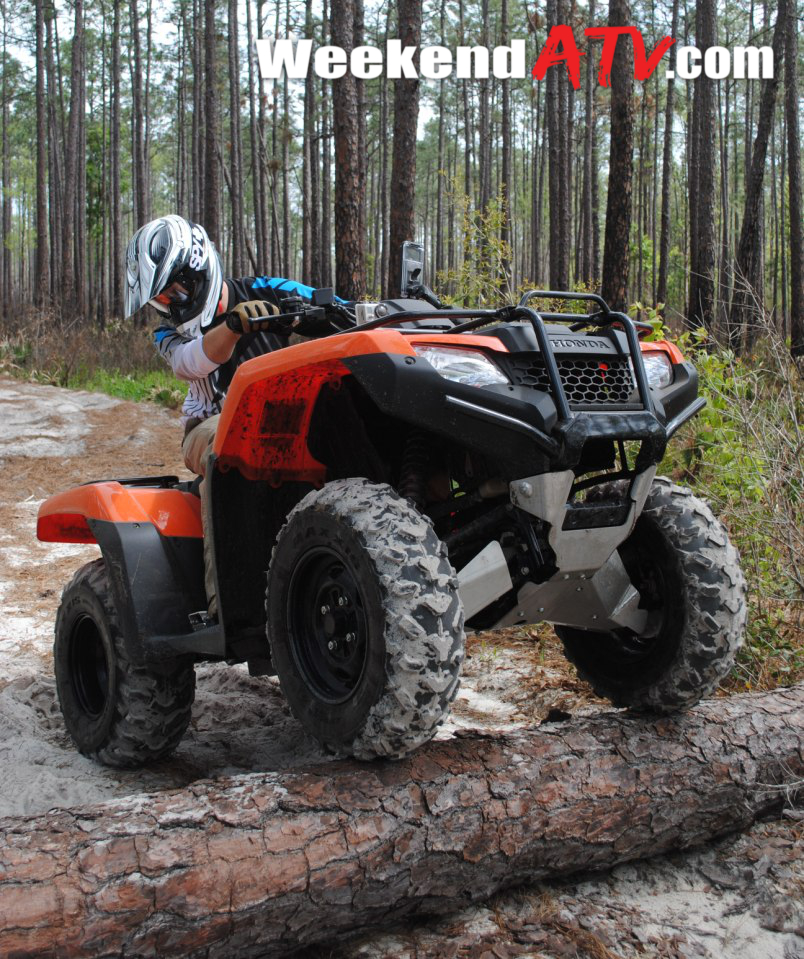
Besides the obvious protection to the frame, engine, front suspension and rear differential the skid plates offer a few more benefits in some terrain. While you may be losing the slightest amount of ground clearance you are gaining the ability to actually slide over obstacles that you might otherwise get hung up on. The plates create a more solid bottom layer allowing you to slid (skid) across downed trees, rocks and other objects that might otherwise leave you high-centered. Especially if you are going slower in fear of damaging your unprotected frame.

Ricochet Offroad Armor Skid Plate

The complete 2014 Honda Rancher 420 kit carries and MSRP of $359. The sections can also be bought individually. Ricochet also released the kit for the redesigned 2014 Honda Foreman 500 which has a nearly identical kit needing only different A-arm guards. Compare the costs to replacing a few torn CV boots, bent A-arm or worse and the armor makes a great insurance policy. For an extra fee you can get the A-arms guard and bash plate or the full kit anodized in various color finishes.

Ricochet Offroad Armor Skid Plate

Ricochet Offroad Armor has been making armor sets for over 30 years. It’s not unusual to see Ricochet armor on GNCC racer rides. Their catalog includes kits for dirt bikes, utility ATVs, sport ATVs, UTVs and the Toyota FJ, Tacoma and 4Runner automobiles. All armor comes with a lifetime hardware guarantee. To pick up an armor set and some peace of mind check out http://www.ricochetoffroad.com/ or call them at 866.273.1197.

REVIEW: Rox Speed FX ATV Foot Pegs

We recently had a chance to be on the front end of a new product release with the Rox Speed FX Universal ATV Foot Pegs. As soon as we saw the press release we contacted Rox Speed FX to see what the fuss was about. Rox Speed FX has been in the powersports industry since the 1990’s when it released Sled Tred, a floorboard traction system for snowmobiles. And while Rox Speed FX has released many products since then, it seems they have come full circle back to maximizing foot traction while you put your ride through the gnarliest of terrain.

Rox Speed FX Universal ATV Foot Pegs

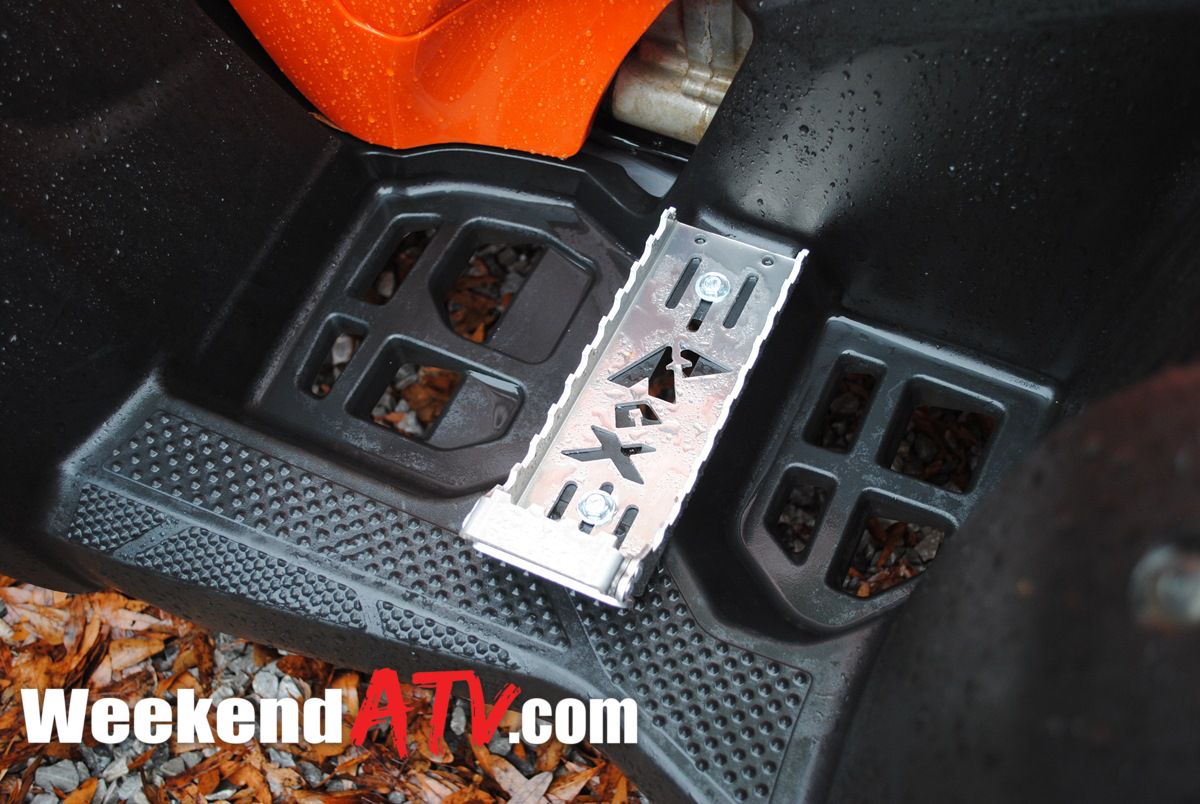
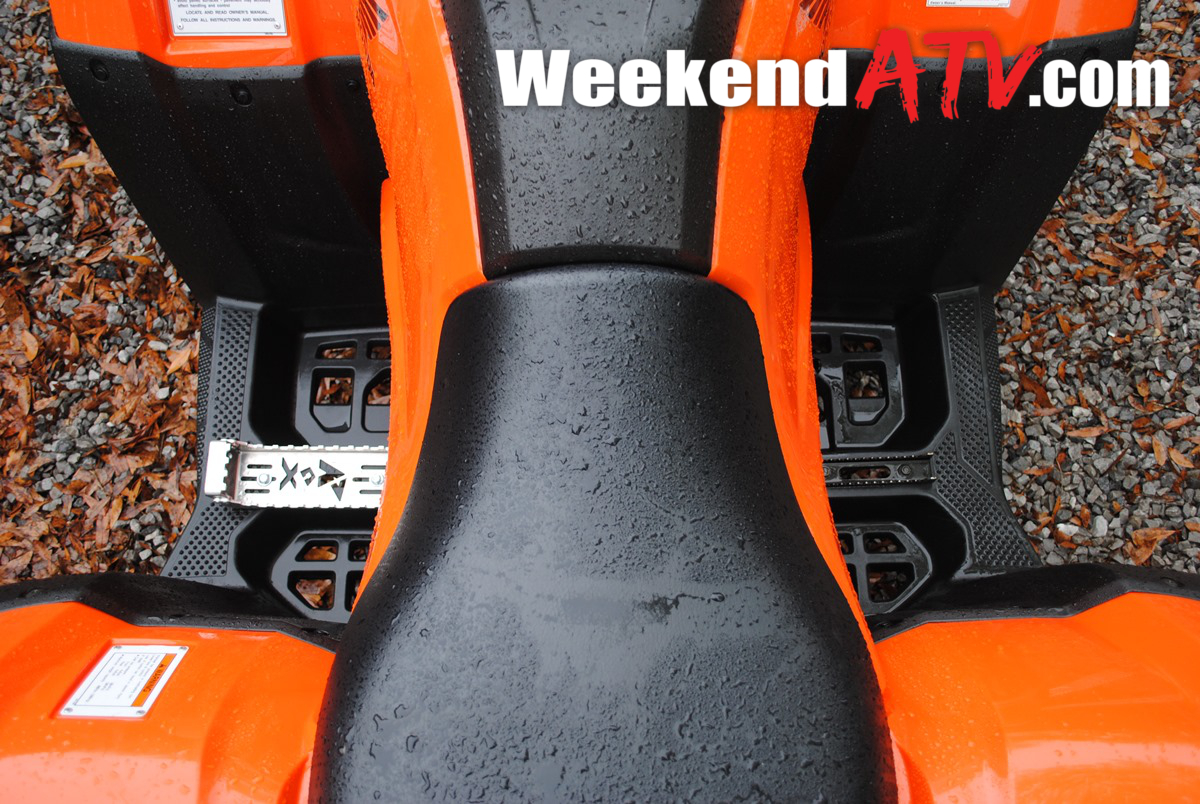
The Universal Foot Pegs aren’t just an improvement on OEM design. It’s a trip back to the drawing board on how to keep your feet securely inside the vehicle at all times. The 3″x8″ surface area dwarfs factory footpegs. The pegs have 10 teeth down each side and another 4 across an elevated outside area to help keep your feet from leaving the floorboards. In a pinch, I think they could be removed and used as a weapon! Despite their size, the lightweight construction makes them close in weight to the factory steel.

Rox Speed FX Universal ATV Foot Pegs

There really isn’t much comparison between the factory foot pegs and the Rox Speed FX Universal Utility ATV Foot Pegs.

Installation is probably the easiest accessory we’ve added shy of a sticker. Most OEM foot pegs are off after removing 2 bolts. In most cases the Rox Speed FX Universal ATV Foot Pegs will mount back into the original mounting holes thanks to the channel design cut into pegs. For our 2014 Honda Rancher DCT we found the most secure fit was to drill a new hole as the outside OEM hole fell inline with the Rox logo giving the bolt less chance to keep its grip. Even with that, installation was under 15 minutes. Alternatively you may choose to mount the Rox Speed FX pegs in parallel to your OEM pegs. All the needed mounting hardware is included.

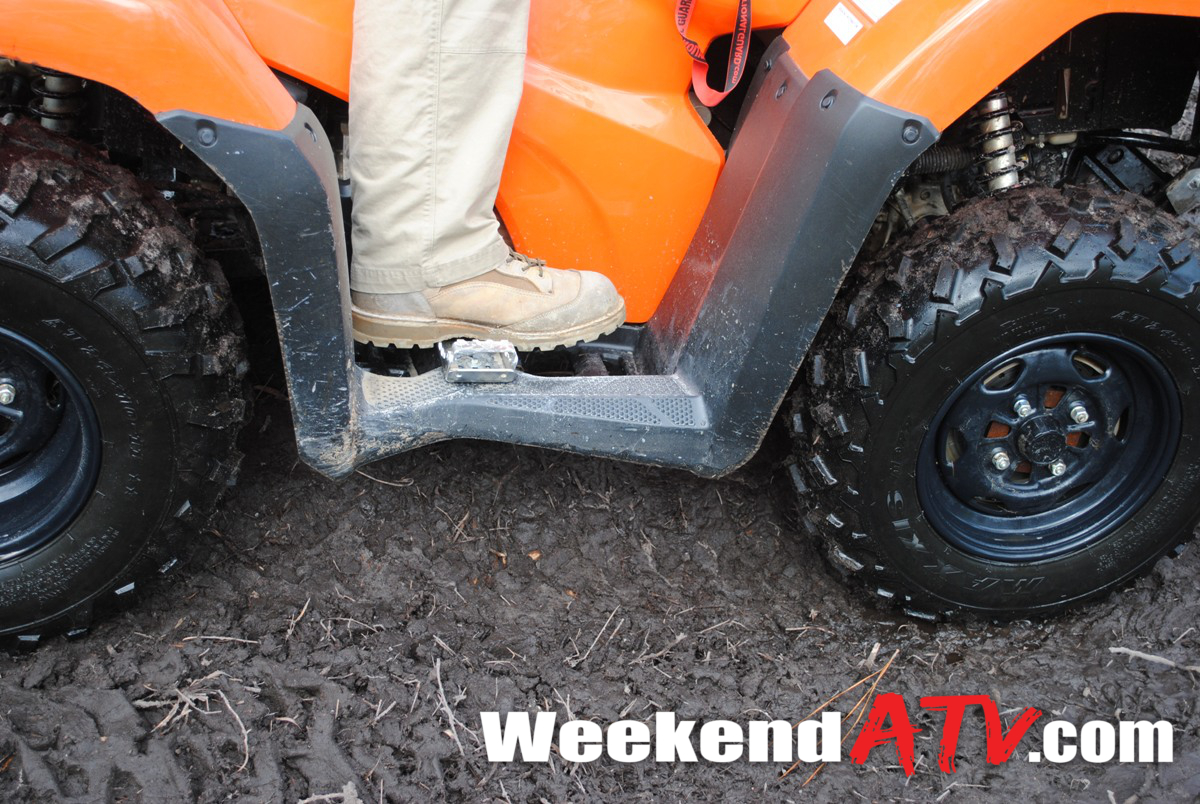
In our test rides we headed to multi-terrain trails to test the grip against sand whoops, hardpack dirt and deep mud holes. No matter how rough the ride or how much traction the tires lost our feet didn’t move. Even repositioning your feet on the pegs takes a deliberate effort. They could not perform better at their intended goal unless you were strapped into them.

Rox Speed FX Foot Pegs

The Rox Speed FX Universal ATV Foot Pegs are already showing up on racers rides in the GNCC circuit. They will likely be a must have for mud racers soon as well. The foot pegs are made in the USA, carry an MSRP of $89.95, and can be ordered directly through Rox Speed FX. To order your own set and browse their other offerings check out http://www.roxspeedfx.com/.

REVIEW: RAM Mounts Aqua Box Pro

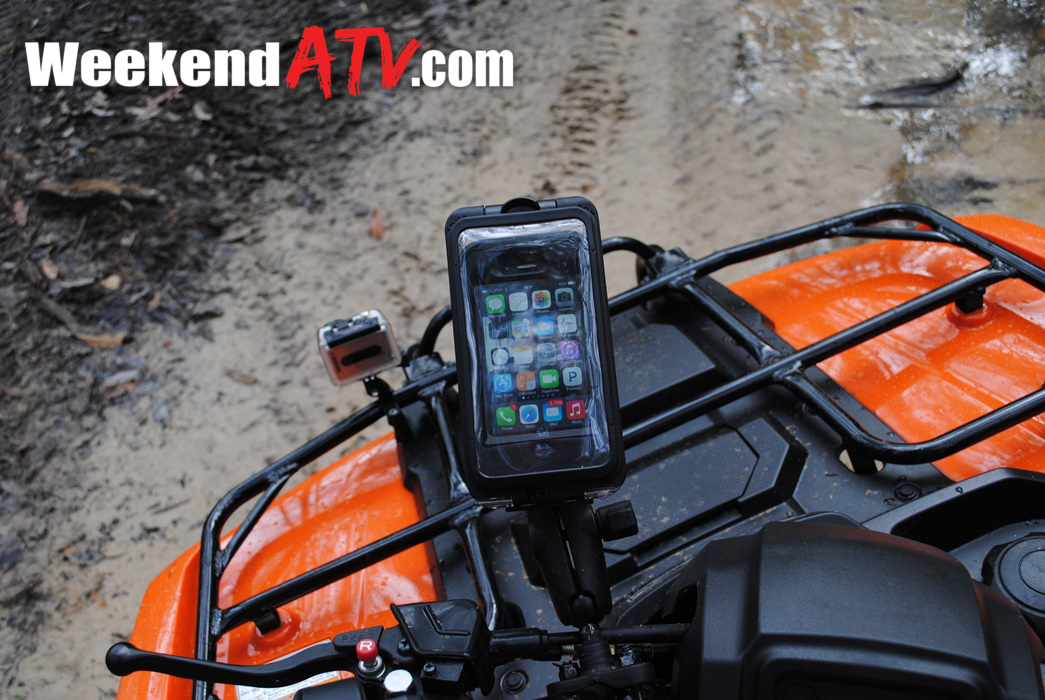
Looking back at our beginnings our very first review was on the RAM Mounts Aqua Box. Still, after all this time, it’s our most used accessory. Maybe we have trouble severing the ties with our work lives that we have to have our phones on the trail. Maybe it’s the hope that our cell signal will be good enough to show the satellite view to get us unlost if needed. Or maybe it’s because we want to quickly call 911 for a medevac the next time someone (who shall not be named) stalls climbing a steep hill and decides to let their ATV ride them back down. Either way the Aqua Box is a staple to our rides. So when we picked up our 2014 Honda Rancher one of our first calls was to RAM Mounts for a new one. Technology changes daily and the engineers behind the Aqua Box haven’t been idle either. They introduced us to the Ram Mounts Aqua Box Pro, a new line that provides even more options.

RAM Mounts Aqua Box Pro

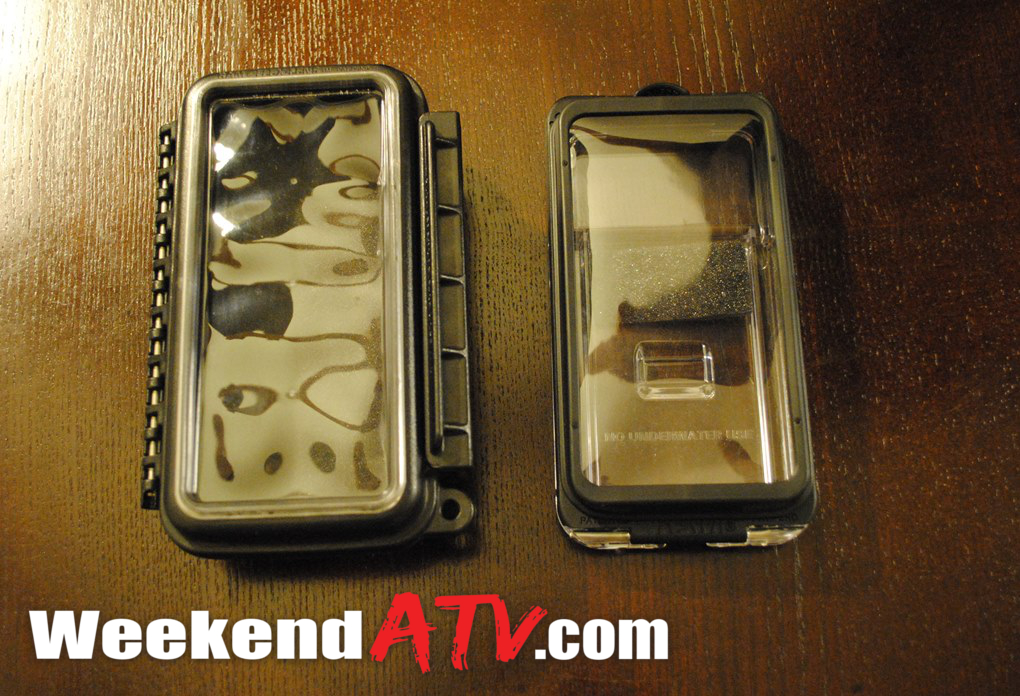
The RAM Mounts Aqua Box (left) and the RAM Mounts Aqua Box Pro (right).

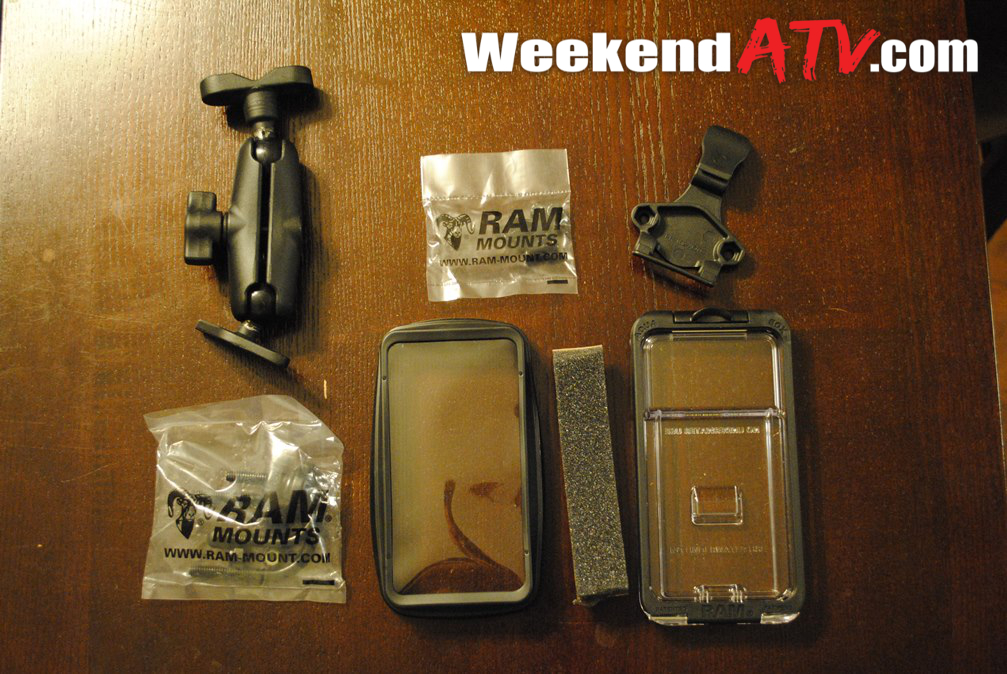
The RAM Mounts Aqua Box Pro differs from the original Aqua Box in several ways. The Aqua Box Pro is still weather-resistant/splashproof, though not quite as much as the original. It’s quick release system allows the Pro to be removed from the mount and carried in your pocket. The new membrane allows full control of buttons on the front and sides of the device as well as full control of the screen, even swiping. The back of the Pro is clear allowing photos and videos to be taken without removing the device from the Aqua Box Pro. There is even a little extra room in the case to hold a few small items like identification. As an added bonus the Pro floats, just in case.

RAM Mounts Aqua Box Pro

The RAM Mounts Aqua Box Pro is available in 3 sizes. The Pro 10 is sized for early generation versions of the Apple iPhone, without any case. The Pro 20 i5 is designed to fit the Apple iPhone 5 without any case. And the Pro 20 is designed to fit iPhones with cases as well as most other phones with interior dimensions of 2.8″ wide, 5.38″ high and 0.55″ deep. Being a big fan of protective cases we opted for the RAM Mounts Aqua Box Pro 20.

RAM Mounts Aqua Box Pro

In our testing we were using Apple iPhone 4s and 5 devices housed in Otterbox cases. Swiping works good as well as most screen inputs. I did find that I had a hard time getting the Done button to respond when trying to unlock the screen. So much so that a crease has formed in the clear cover. This only seems to be an issue when using buttons in the corners of the screen. Other phone makes or using an iPhone without an Otterbox may have worked better. Navigating through Apps, photos, music, etc all ran smoothly otherwise. Also keep in mind that the Aqua Box Pro is not waterproof, so if you like to walk your snorkled quad across ponds then you should stick to the original Aqua Box. I had no issues during normal riding and mudding, but my phone did get wet at the bike wash afterwards.

RAM Mounts Aqua Box Pro

Overall the RAM Mounts Aqua Box line is a great solution for keeping your device accessible on a ride. You riding style or conditions may determine what model is best for you. Our setup as shown carries a reasonable MSRP of $61.06 and includes a lifetime warranty. Additionally, like all RAM Mounts gear, it’s made in the USA. To pick out your own RAM Mounts Aqua Box Pro or other gear from Ram Mounts see http://rammount.com/.

REVIEW: Shorai LFX Batteries

One area of the powersports industry that has seen a lot of change lately is batteries. Battery technology was developed in the mid-1800s and remained relatively unchanged until the mid-1990s when university researchers developed lithium batteries. Lithium ferrous phosphate (LiFePO4) batteries are a perfect fit to the rugged uses found in the powersports industry. Several companies have been producing LiFePO4 batteries over the last few years including LFX Batteries by Shorai.

Shorai LFX Batteries

Like other LiFePO4 technology batteries, Shorai LFX Batteries hold many advantages over lead-acid units. First off, they are about 80% lighter on average helping to easily remove weight from your ride. There are also no harmful chemicals in a LiFePO4 battery making them safer and allowing them to be mounted in any position, including upside-down. Another great benefit is that they have a longer maintenence-free lifespan. A lead-acid battery constantly degrades while sitting idle. LiFePO4 batteries lose only a small percentage over an entire year. Good luck finding a lead-acid battery that will crank after sitting for a year.

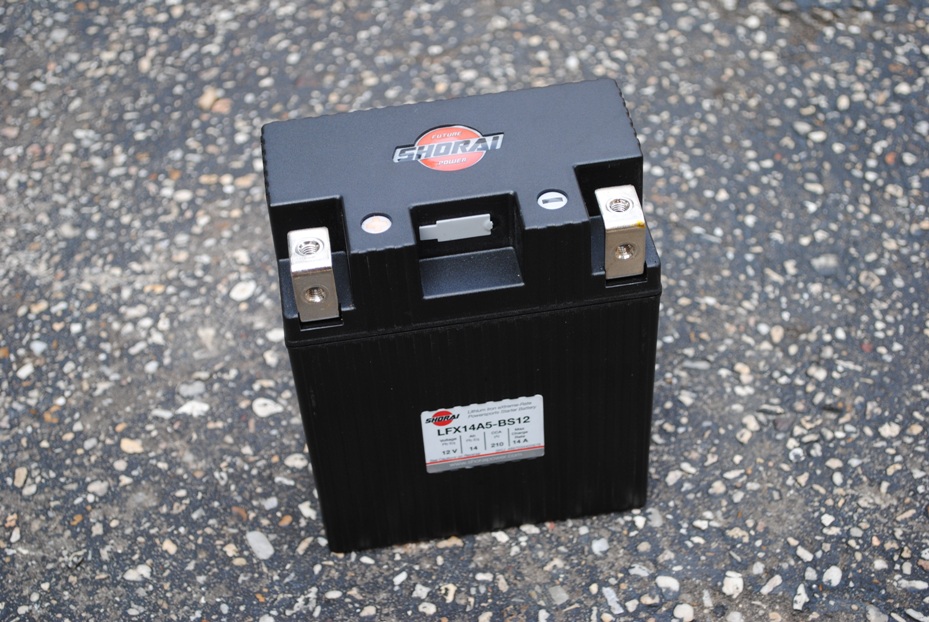
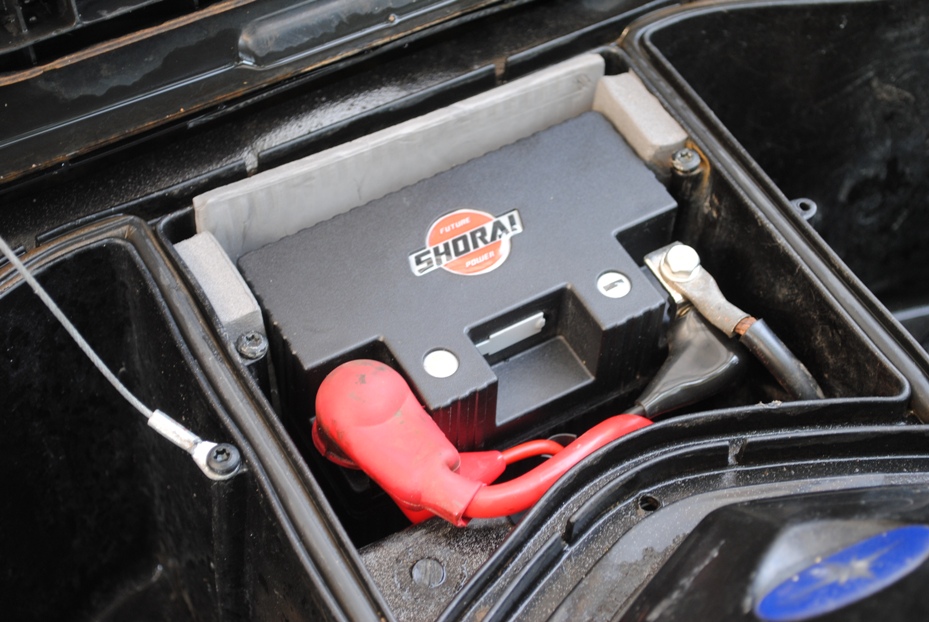
We decided to try out Shorai LFX Batteries ourselves by upgrading our Polaris Hawkeye 300. The old lead-acid battery had just recently failed us and it was a great chance to upgrade during our spring maintenance. Shorai produces some 20 different battery models in their LFX line. Shorai’s website has a battery finder that allows you to select your powersports vehicle and see the appropriate battery selection. Our application called for the LFX14A5-BS12. With an MSRP of $159.95 it’s on par with most other similar LiFePO4 offerings.

Shorai LFX Batteries

Our battery arrived by mail packed in its retail box, tucked in by foam shims. It also contained a manual, two sets or terminal screws and a collection of Shorai stickers. The physical dimensions of the battery were very similar to the OEM lead-acid battery we removed. Our OEM battery was 6.5″H x 5.25″L x 3.5W while our Shorai measures are 6.3″H x 5.28″L x 3.15″W. This actually makes Shorai LFX Batteries larger than most other LiFePO4 batteries we have seen though they are still perfect for your OEM swap. If there is any spare room in your battery compartment, the included foam shims can be cut and placed inside the compartment for a solid fit.

As far as weight is concerned, there is a big difference between lead-acid and LiFePO4 batteries. Our LFX battery weighs in at only 2.31 pounds compared to our 10.4 pound lead-acid rock. Racers looking to gain a little speed will have a hard time finding an easier or cheaper way to lose 8 pounds. But don’t let the lightweight fool you. This battery still produces 210 cold cranking amps (CCA).

Perhaps one of our favorite things about the Shorai LFX Batteries is the terminal posts. The posts are designed in an “L” shape and have locations to simultaneously use 2 sets of terminal screws. This makes it easy to add accessories without stacking. We placed our winch leads on one set of terminal screws and the Polaris’s electronics on the other.

Shorai LFX Batteries

Shorai LFX Batteries ship charged and ready for your ride. While they generally don’t need to be maintained you can use traditional battery chargers as long as they do not use automatic desulfation mode. Shorai does produce its own charger that is designed to balance each individual cell and can increase the life of the LFX battery.

Shorai LFX Batteries have a 3 year warranty. That’s longer than the entire life span of a lead-acid battery and much more than the warranty period. Ours has performed great so far. We will provide updates here if we see any performance changes and also to let you know exactly how long our Shorai LFX Battery lasts. To locate your own Shorai LFX Battery check out their website at http://www.shoraipower.com/.

REVIEW: Ballistic EVO2 Performance Batteries

So you’re all set for a weekend on the trails. Your buddies are packed and headed over to load you up. You step out to crank up your ride. A turn of the key and your mighty beast should respond with a roar, but instead you just get a disheartening ‘click’. There is a good chance you are suffering from a dead battery.

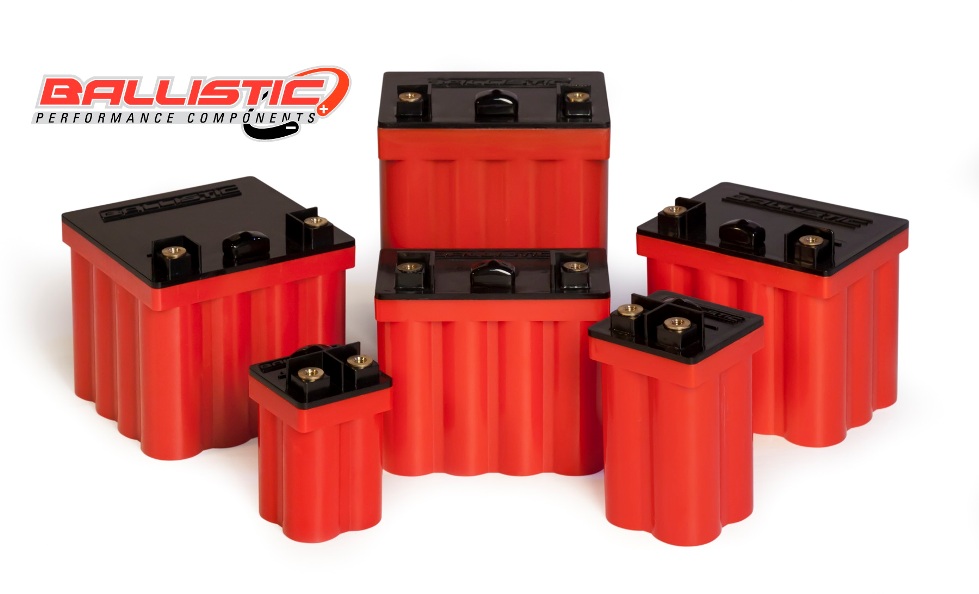
The Ballistic EVO2 Performance Batteries Lineup

It’s an annual affair for most. Traditional lead-acid batteries have a life span of about a year and a half to two at best. But the powersports industry has had a growing trend of lithium batteries like the Ballistic EVO2 Performance Batteries. Lithium ferrous phosphate, aka LiFePO4, is based on technology developed by researchers at the University of Texas in 1996. The end result is a smaller, lighter, safer, maintenance-free, longer-lasting battery.

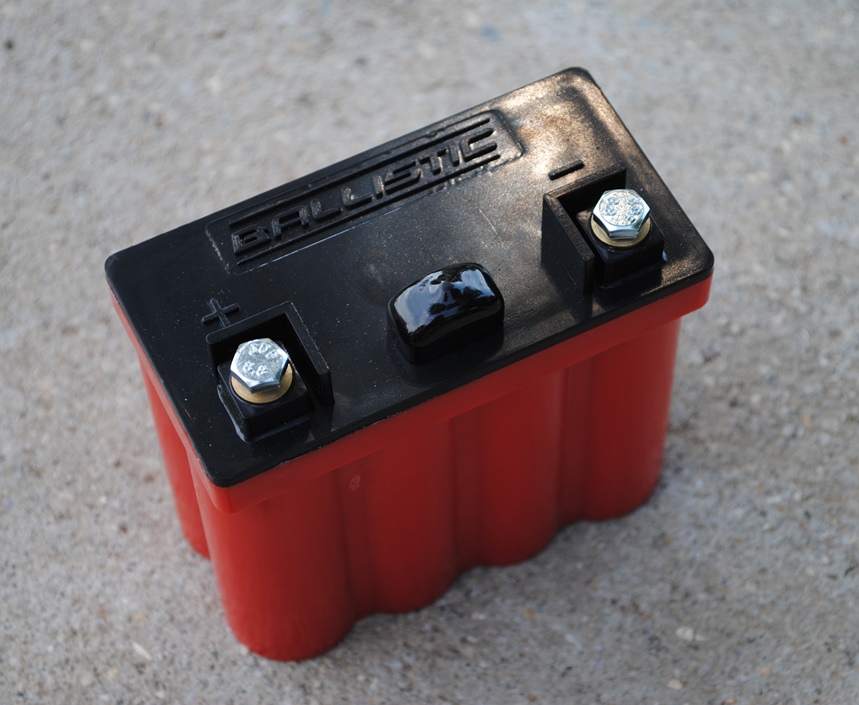
The 8-cell Ballistic EVO2 Performance Battery

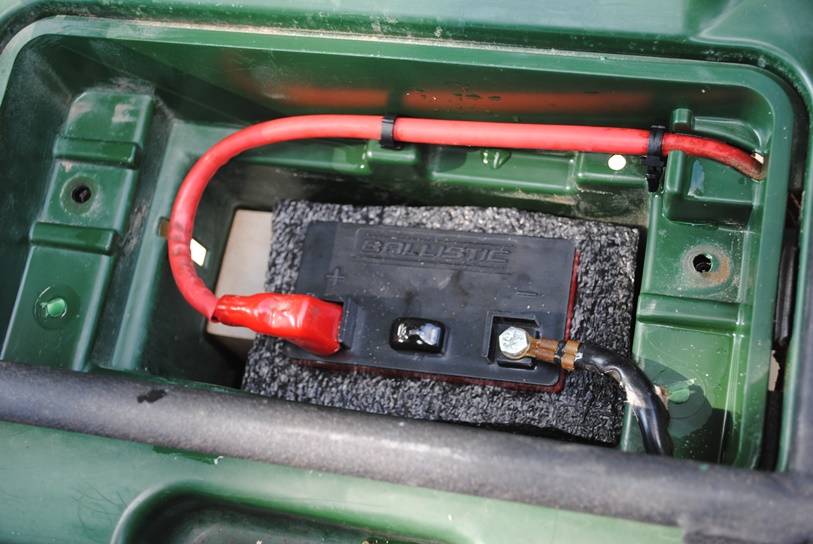
We decided to upgrade the battery in our Yamaha Big Bear 250. The battery finder on Ballistic’s website recommended the 8-cell unit for normal environments or the 12-cell for primarily cold areas or units with lots of accessories. With most of our riding taking place in the southeast US we picked up the 8-cell (P/N 100-011). The battery puts out 13.6 volts and 275 burst cranking amps. It is designed to work in temperatures from 0-140 degrees F. Inside the package was our battery, foam material for shipping and installing, and a few Ballistic stickers.

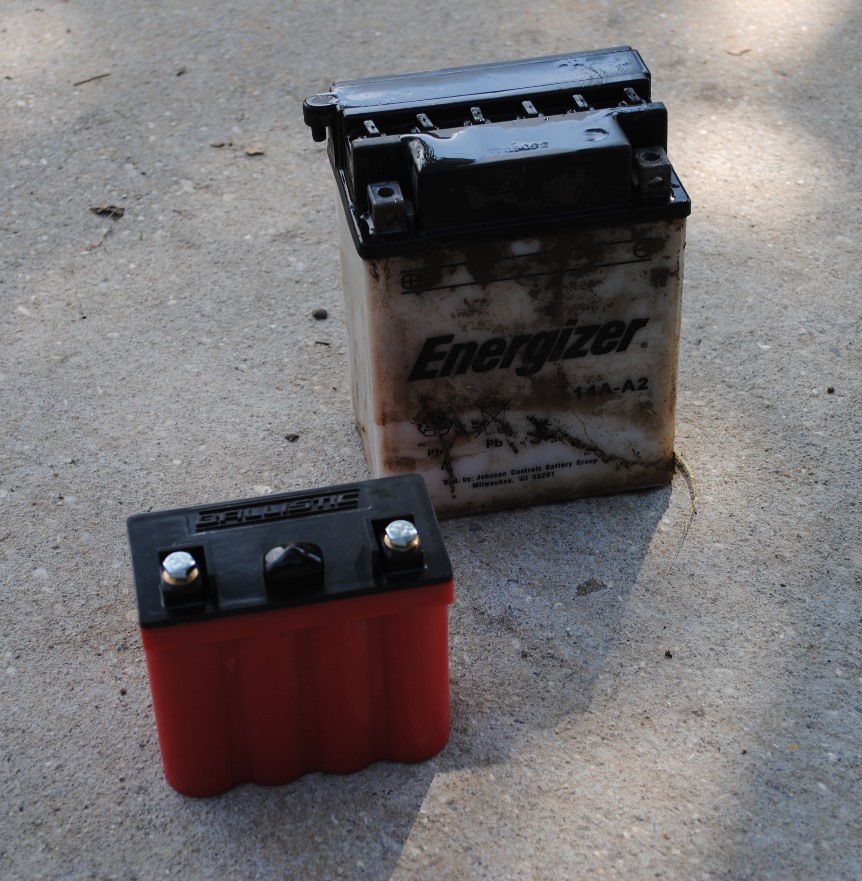
The 8 cell LiFePO4 battery versus the OEM lead-acid.

Our new battery came in at a mere 4.5″L x 2.5″W x 4.25″H and 1.7 pounds compared to our OEM battery at 5.25″L x 3.5″W x 7″H and 10.4 pounds. That’s a savings of almost 9 pounds making this the easiest and least expensive way to shed weight off your ATV and potentially gain a little speed. Since the Ballistic EVO2 Performance Batteries are also a great deal smaller than their OEM counterparts they risk bouncing around inside the battery compartment. To resolve this simply use the foam packaging that the battery came with. It trims easily with a serrated blade and helps secure the battery in place.

The Ballistic 8 cell ready to go.

Ballistic batteries come with a Battery Management System (BMS) port on top. While not necessary, a charger is available from Ballistic that helps balance each cell on the battery to extend the life of the battery even further. A standard trickle charger can be used as long as it has auto-shutoff to prevent over charging. Ballistic EVO2 Performance Batteries ship at 70% of their charge, more than enough for a good start. Put to its first test it did not disappoint and has been running great during its first week. They are claimed to only lose 10% of their charge during a static year compared to as much as 1% per day for lead-acid batteries.

Ballistic EVO2 Performance Batteries come with a 3 year warranty and are made right here in the USA. LiFePO4 batteries do have a higher price than lead-acid batteries. The MSRP on the 8-cell Ballistic is $169.95, about 3 times the cost of an equivalent lead-acid battery. However, the features and convenience make it a great option. We’ll provide updates here during the life of our battery, but don’t count on that being anytime soon. To find your own Ballistic EVO2 Performance Battery check out their website at http://www.ballisticparts.com/.

REVIEW: RAM Drink Cup Mount

With any activity hydration should always be a consideration. While ATV riding may often not be physically demanding it is important for your own health and safety to stay well hydrated. In recent years ATV manufacturers seem to be noticing this and are including cup holders built into many ATVs. However, there are still many models where an upgrade is required. Our friends at RAM Mounts are just the sort of supplier for this.

RAMcupholder02

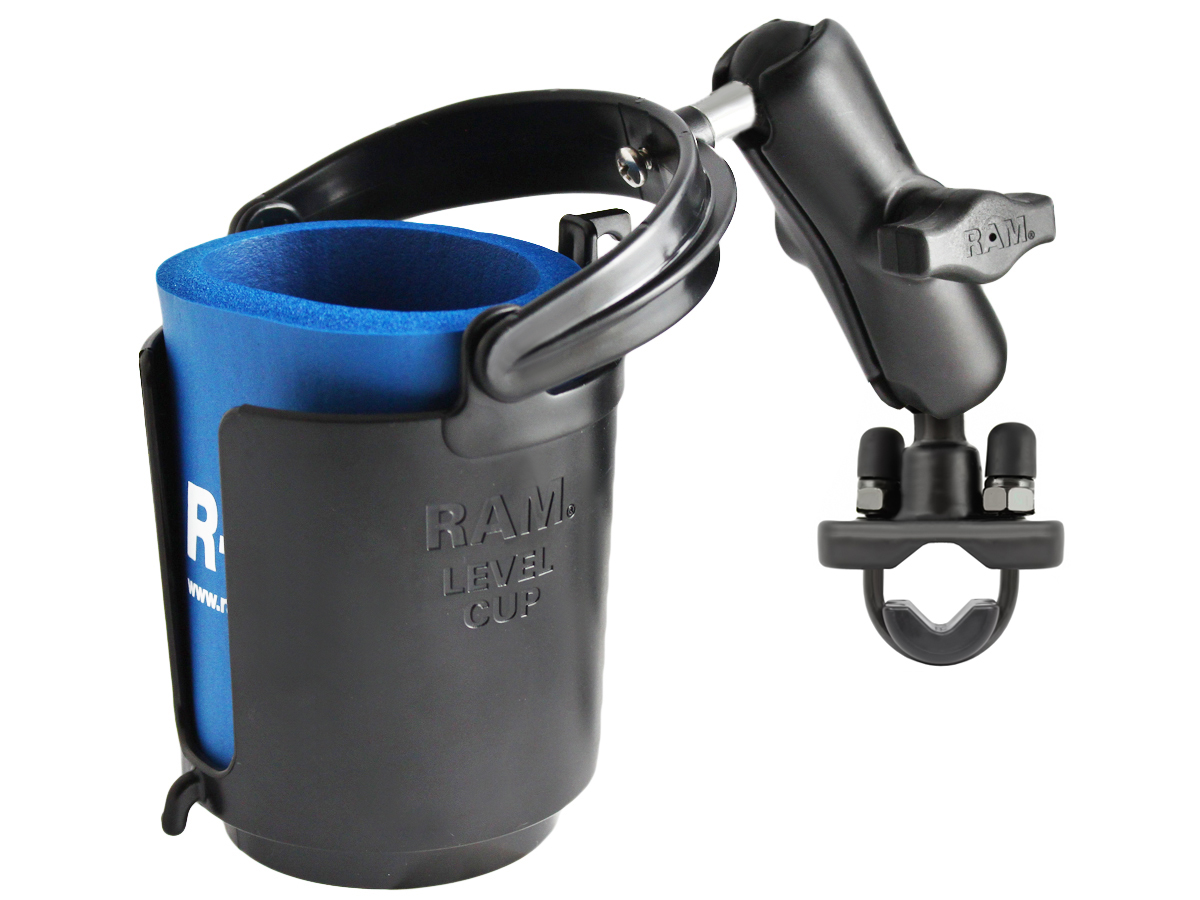
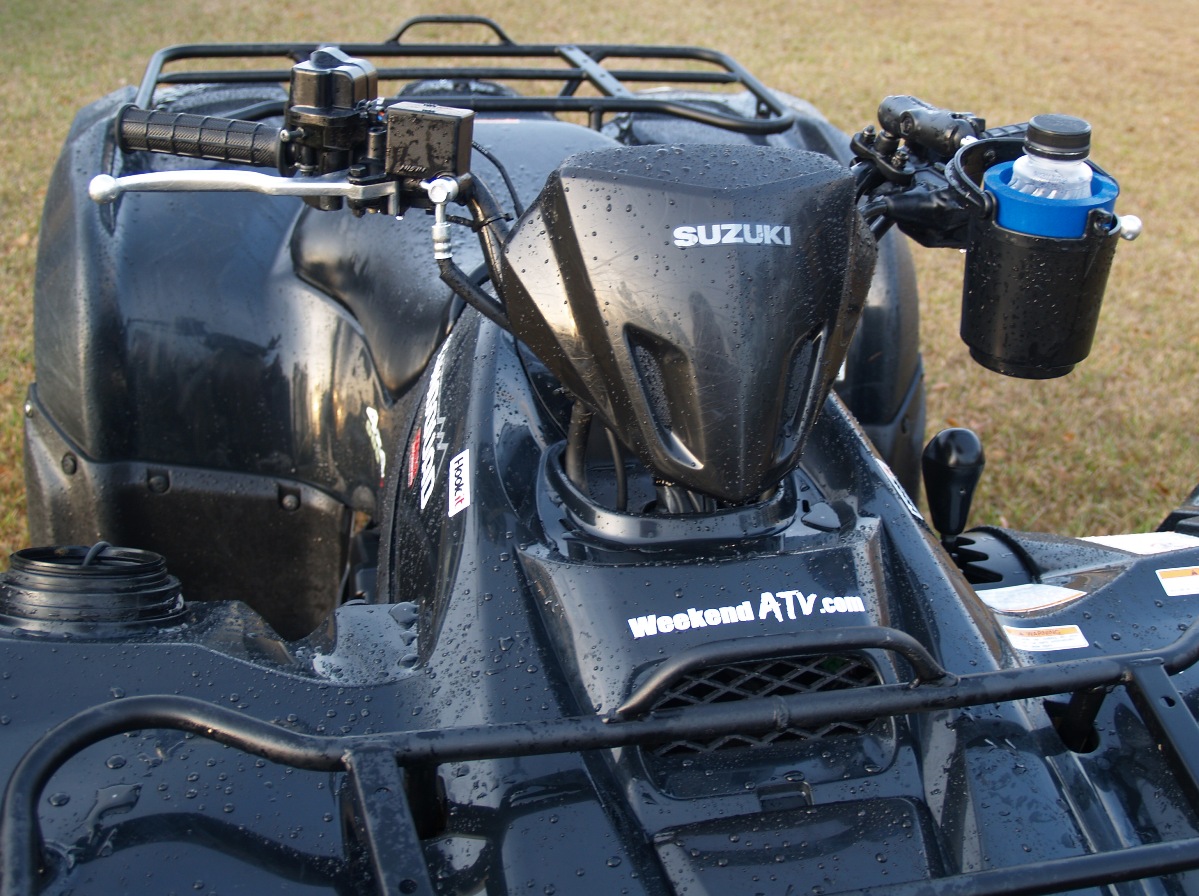
I have been the lucky one to try out the RAM Drink Cup Mount (RAM-B-132RU). I have used it on a dozen or so trips and it really does the job. Like all of our RAM Mounts reviews, installation is extremely easy. The toughest part is deciding where to mount it.

RAM Cup HolderThis is a true 5 minute install. The package come with a U-bolt mount, socket arm, and cup holder with a koozie. The mount and U-bolts attach to the handle bars (in my case) or any bar you wish from 0.5″ to 1.25″. The default U-bolt mount (RAM-B-231ZU) is not rust-proof. However, the rust-proof RAM-B-231U is at virtually the same price, but only accommodates 0.5″ to 1.0″ bars. The 3″ long mount arm allows the cup holder to be mounted at almost any angle. The arm is very easy to tighten and does not move once properly secured. Finally, the cup holder attaches to the arm. With a 12 oz drink, the cup holder attachment allows for 360 degree movement for the roughest of rides. The koozie creates a snug fit for drinks of various size.

RAM Cup HolderOver the past few trips, we have been on some really rough trails and I’ve yet to lose a drink! If you are tried of losing your drink, RAM Mounts has a solution for you. In addition to the handlebar mount, they have a variety of mounting solutions to fit your fits. In fact, I challenge you to find a legitimate mounting desire that they don’t have a good solution for. The MSRP on this RAM Mounts kit is $37.32. To order a RAM Drink Cup Mount for yourself check out their online store at http://www.rammount.com/

REVIEW: Eagle Eye Lights HID Kit

A continuously growing trend in the offroad industry is upgraded lighting including HID lamps. HID stands for High Intensity Discharge. The HID bulbs create an arc which heats up metal salts inside to the point where they become plasma. This plasma greatly increases the intensity of the light and allows for reduced power consumption while on. Ballasts are used to get the arc started and then maintain the proper amount of power for the remaining run time. HID lighting is much more durable in offroad conditions since the arc replaces the fragile filament found in halogen bulbs. And despite the idea of turning metal salt into plasma, HID lights actually run much cooler and use less power than halogen.

Eagle Eye Lights HID Review

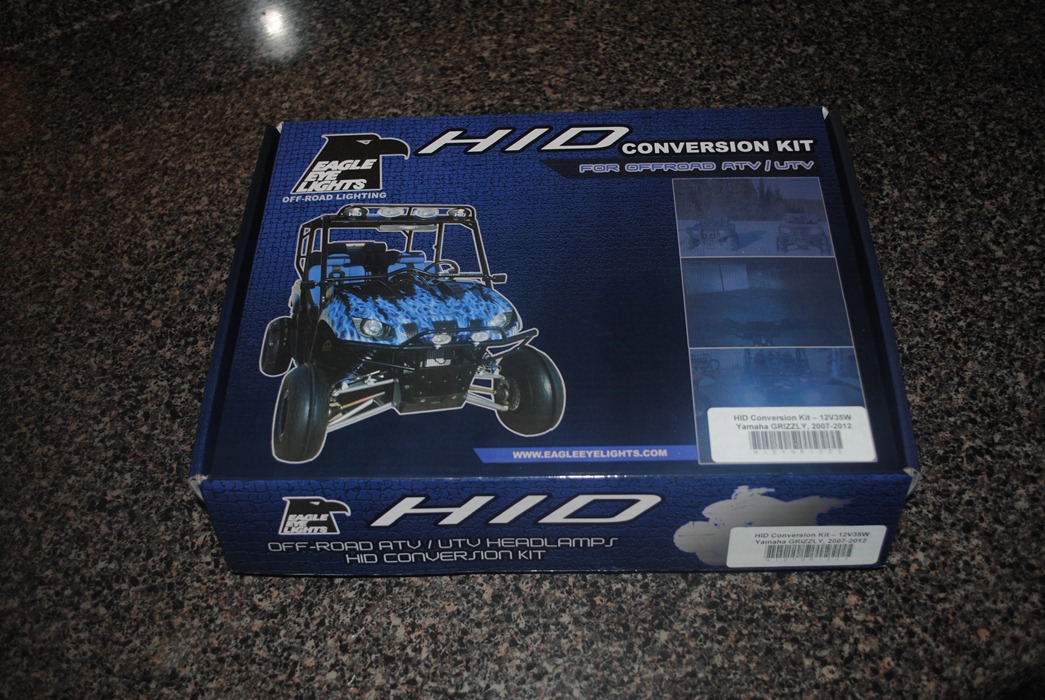
Southern California’s Eagle Eye Lights has been manufacturing offroad lighting solutions since the 1990’s. They have halogen, HID and LED packages. Their HID options include Plug-N-Play HID conversion kits for most popular ATVs and UTVs. They recently sent us their HIDYGRIZZ2 headlight conversion kit to try out.

Eagle Eye Lights HID Kit

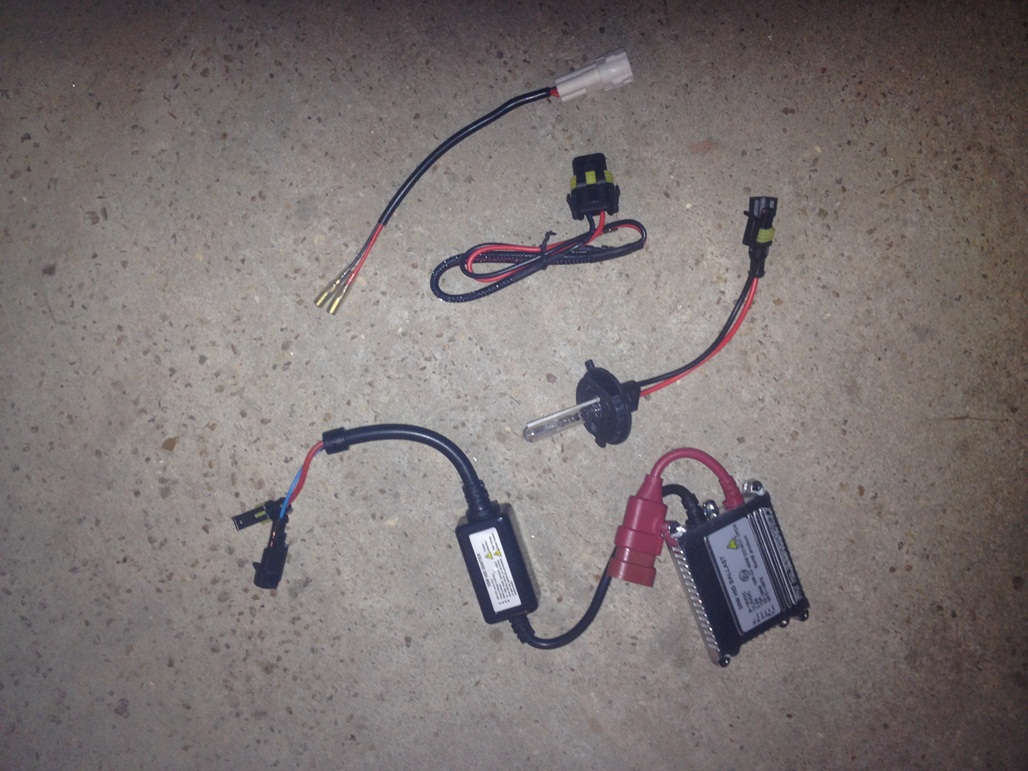
Half the kit, this is what your factory light and wiring harness is replaced with.

The HIDYGRIZZ2 kit is designed for 2007-2013 Yamaha Grizzly 550 and 700 models. It features two HID Xenon bulbs with 35 watt ballasts. Mounting hardware and Plug-N-Play wiring harnesses are included. Installation is touted to take about 20 minutes. The bulbs have a 2000+ hour life expectancy and put out 6,000 Kelvin (K). Kelvin is the color hue of the light. For comparison, a 55 watt halogen bulb produces 2300K, which gives it the yellowish color. Daylight is about 4300K. The 6,000K of Eagle Eye Lights provides for the best color option without sacrificing output.

Eagle Eye Lights HID

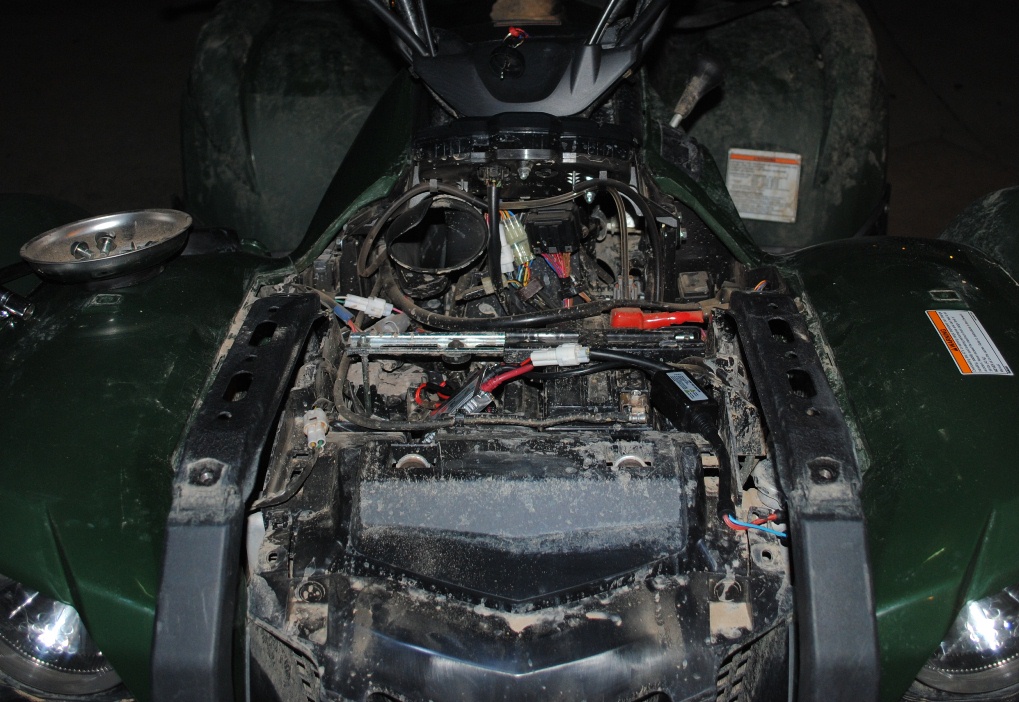
Getting to the factory wiring harness and feeding the replacement required some panel removal.

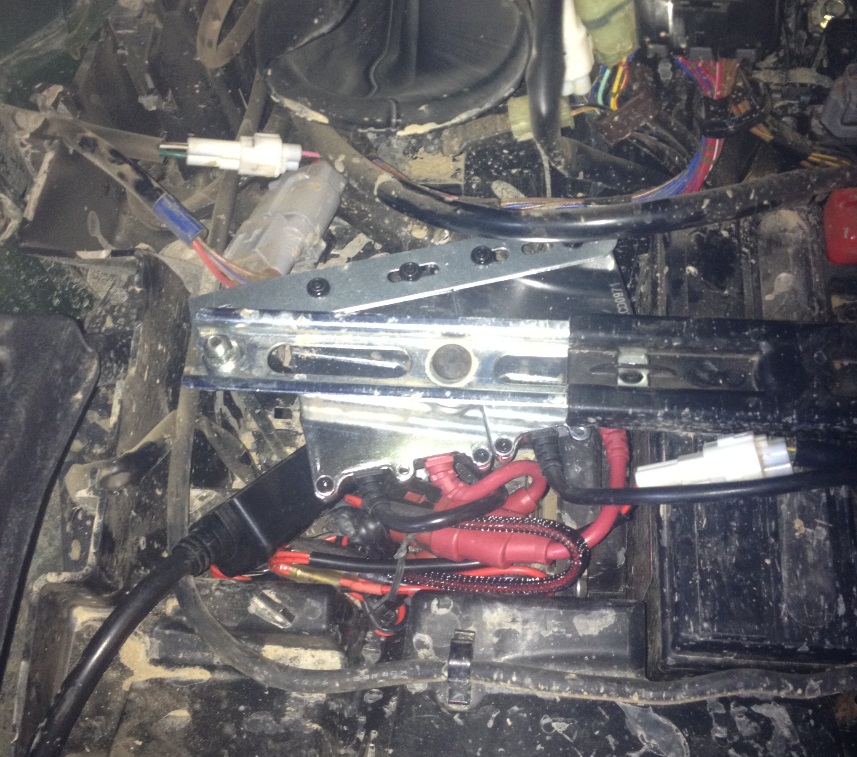
We conducted our install on a 2012 Yamaha Grizzly 550. While we can’t speak to the Grizzly 700, we can say that the 20 minute install on a 550 is not likely to happen. The instructions are fairly vague from what we would have expected. It’s pretty much just remove the rubber boot, switch out the headlights and plug in the various wiring harnesses while mounting the ballast somewhere. We found that the wiring harness connection was under the dash and required the removal of the front rack and dash for the installation. All of the connections are solid, waterproof connections and truly plug-n-play. The kit included two mounting brackets for the ballasts. Again, there were no instructions as to where the ballasts should be mounted so we modified one bracket to hold both ballasts and mounted it on the bar that holds down the battery. There is a nice void there that gave plenty of room for the ballasts and slack wiring.

Eagle Eye Lights HID

Our ballasts and extra wiring tucked into the void beside the battery. It’s the clean parts!

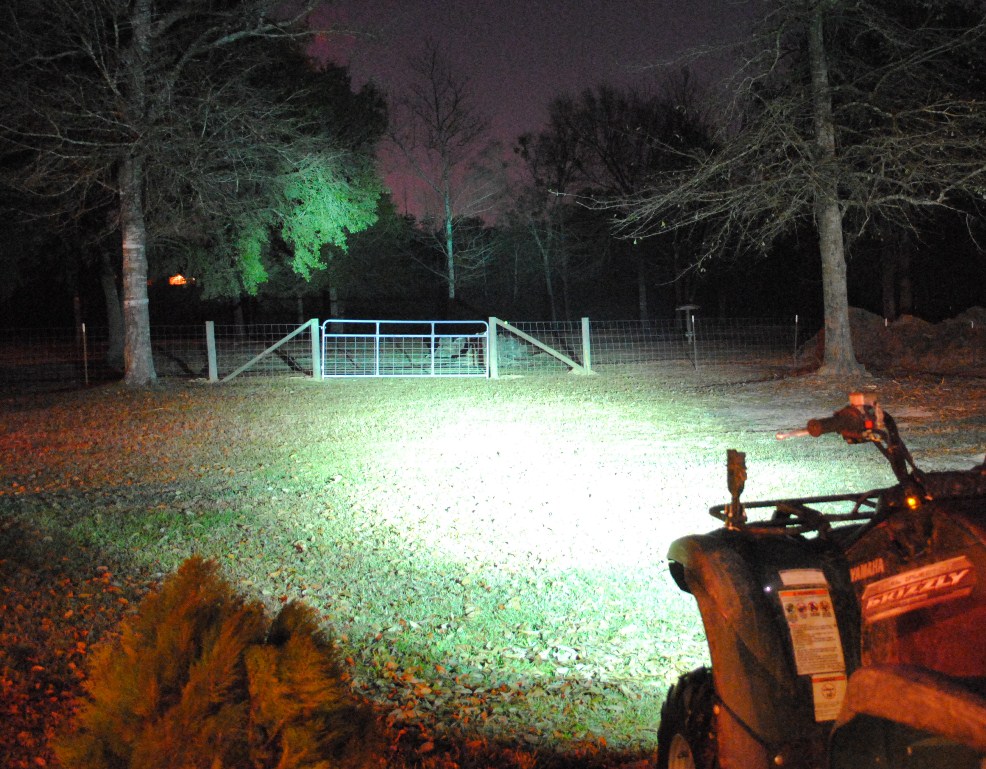
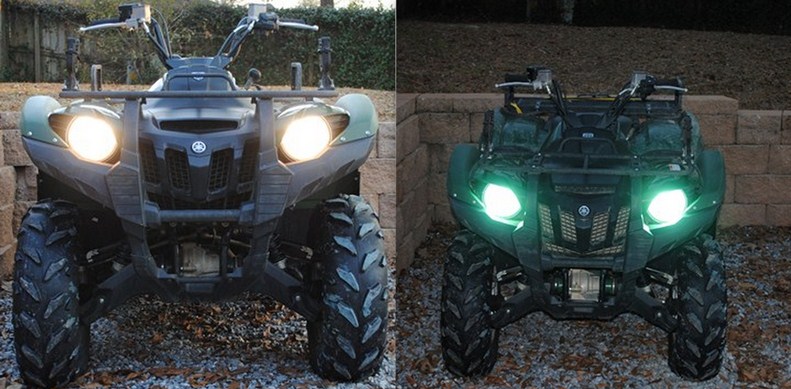
Once the installation was completed we fired up the lights. There is a very noticeable difference in the color of the light. It is more natural and requires less eye strain. There is also an increase in the visible range provided by the upgraded lights.

Eagle Eye Lights HID

Before: Yamaha factory halogen lights.

Eagle Eye Lights HID

After: Eagle Eye Lights HID Kit. Notice the trees in the distance are much more visible.

The instructions recommend upgrading the factory headlight fuse from 15 AMPs to 20 AMPs. The reason is for the increased amount of power required to start-up the ballasts. It can result in one or both lights not powering up. We confirmed this experience in our own tests where we saw only one light power up without the upgraded fuse.

Eagle Eye Lights HID Kit

Bottom line, these lights are an excellent addition. If you commonly ride at night, an Eagle Eye Lights HID Kit would be a perfect add-on and provide for a safer ride. While the installation may take a little longer on your particular ride, it is still one of the easier installations you’ll probably ever do. The kits range from $99 to $199; our test kit lists for $179. For more information on Eagle Eye Lights and what they have for your ATV or side-by-side, see their website at http://www.eagleeyelights.com/ and check back with us for future reviews of their lights.

REVIEW: RAM Mounts X-Grip

Chances are you have some type of device mounted on your windshield or dash. GPS, radar detectors, performance tuners and mobile phones are common, as are the rings left on the windshield from the suction cups. Some of these devices don’t include a mount requiring you to pay $30+ for $3 worth of molded plastic and suction cup. Others come with a mount that is difficult to replace or you end up trying some imported knock-off that breaks a week later. There just never has been a perfect solution for everything. At least that was my impression before RAM Mounts sent us their X-Grip.

Image courtesy of RAM Mounts

The X-Grip may be universal, but don’t say it in the same breath as any other mount. Out of the box you can feel it’s quality, by its weight alone. There is as much, if not more, metal in the X-Grip as there is plastic. If you accidentally drop it it won’t shatter into a dozen pieces. If anything it might chip the asphalt where it landed. These are the people who make nearly bomb-proof center consoles for police cars after all. Don’t let the heavy-weight quality worry you though, the suction cup and other mounts don’t fail, but I’m getting ahead of myself.

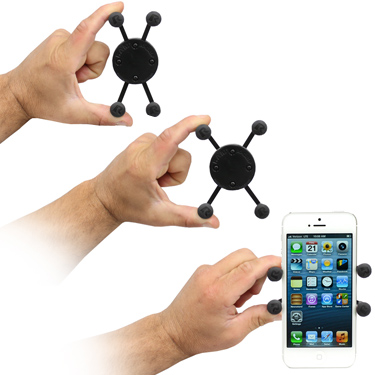
The X-Grip has two spring-loaded arms that are joined in the center to make an X shape. You can easily put in your device and it is held tightly by the rubber pads on each end of the X’s “feet”. The minimalism of the feet mean you’ll easily be able to access buttons and plugs around the device. The X-Grip’s size is perfect for smart phones in the Apple iPhone range, we also tested it with a TomTom One GPS and SCT Livewire, though the Livewire fit was snug. It was also a good size for our Garmin eTrex GPS. The feet can go as small as 0.875 inches and as large as 3.25 inches. The depth measures 0.875 inches as well.

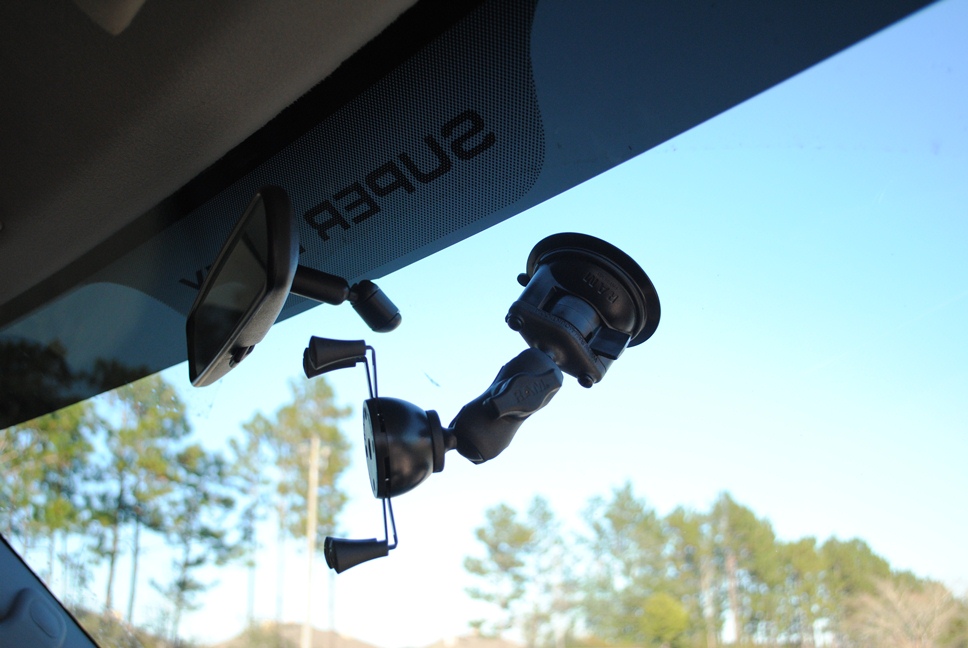
The back of the X-Grip features the RAM Mounts ball mount. This attaches to an included arm with sockets on both ends. This gives you an endless amount of articulating to place your devices exactly where you want it to be. This arm has a handle in the middle that tightens the grip on both ends. Once you tighten it down it’s not going to move at all. Not even if you try a one-handed adjustment while heading down the road so make sure it’s where you want it in your pre-flight check.

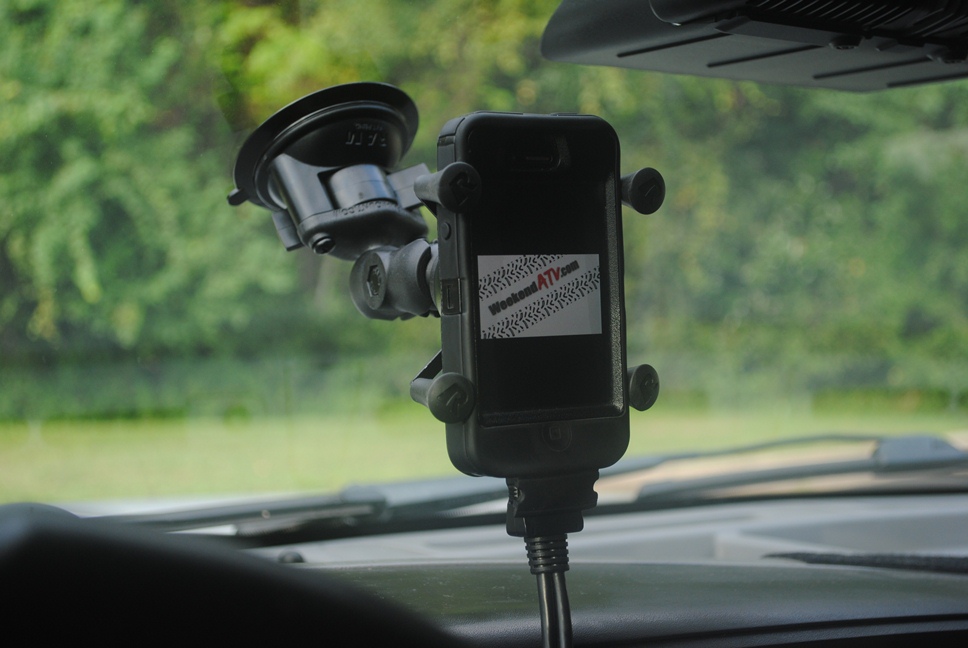
The final piece of the X-Grip depends on your needs. Our unit came with a suction cup mount, but there are mounts for rails, handlebars, cup holders, adhesive mounts, clamp mounts, screw-in mounts and even a mount for your motorcycle’s brake/clutch reservoir. While suction cups are often known the fail the secure clamp on this mount never had us worrying despite some abusive roads on our road trips. The RAM ball mounts make it easy to move the X-Grip (or other RAM Mounts products) between settings. Our X-Grip moved easily from our truck windshield to our ATV handlebars in place of our RAM Mounts Aqua Box allowing us to swap a handle bar mounted iPhone for a handheld GPS.

If you have already bought into how incredible RAM Mounts systems are then adding the X-Grip will only set you back another $22.84 (Part number RAM-HOL-UN7BU). If you don’t have any mounts then a X-Grip set starts at $30.41 with an adhesive mount and goes as high as $65.13 with a cup holder mount. Considering the replacement mount for my busted TomTom One is $24.95 the X-Grip is a deal. And chances are it will work on the next device you get too. Interested in carrying a tablet or Apple iPad? They have an X-Grip for that too!

For more details or to order a Made in America X-Grip for yourself check out RAM Mounts at http://www.rammount.com/NewProducts/RAMxgripmount/tabid/4515/Default.aspx.

REVIEW: Bubba Rope Lil’ Bubba Recovery Rope

There are two vital lessons to off-roading that are often learned the hard way. Don’t do any serious riding alone and always, ALWAYS bring a tow rope. Over the past couple of weeks we have put the Lil’ Bubba recovery rope by Bubba Rope to the test and it is certainly one of the best ropes money can buy.

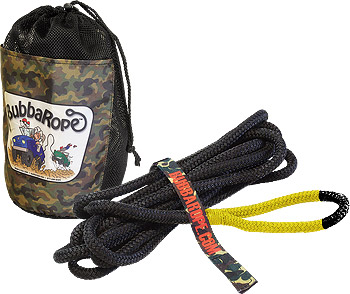
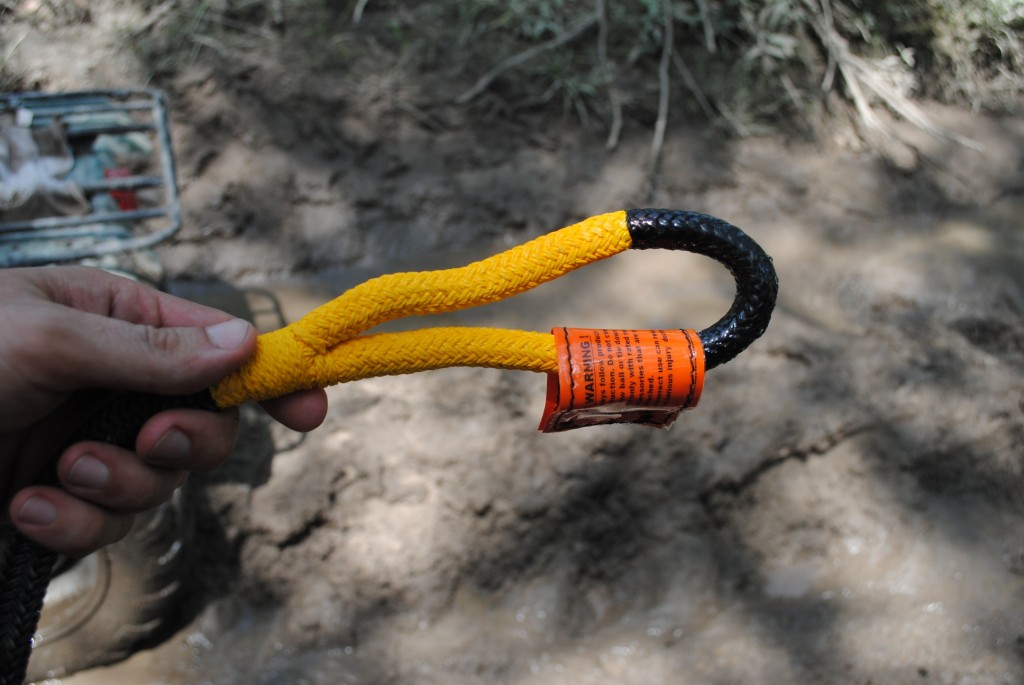
Bubba Rope tow ropes are considered “snatch ropes” because they will stretch and are designed to not just pull, but jerk a stuck vehicle free. This can be especially helpful to overcome the suction effect that mud can have. The elastic also makes the recovery effort smoother for passengers and the vehicles themselves. All Bubba Ropes are made of 100% double braided nylon with a urethane polymer coating. The large loops on both ends are commercially spliced and seized. The ends are then dipped in a high performance elastic polymer coating, a process Bubba Rope calls “Gator-ize.” This coating helps to protect the heavily used loop ends. 

The Lil’ Bubba recovery rope is 1/2″ thick and 20 feet long. It has a breaking strength of an insane 7,400 pounds! That’s way more than enough to get your ATV or side-by-side out of anything. Bubba Ropes have their capacity and other necessary information printed on a label that is attached directly to the rope. Bubba Ropes are also resistant to UV, water and abrasives that are harmful to most tow straps.

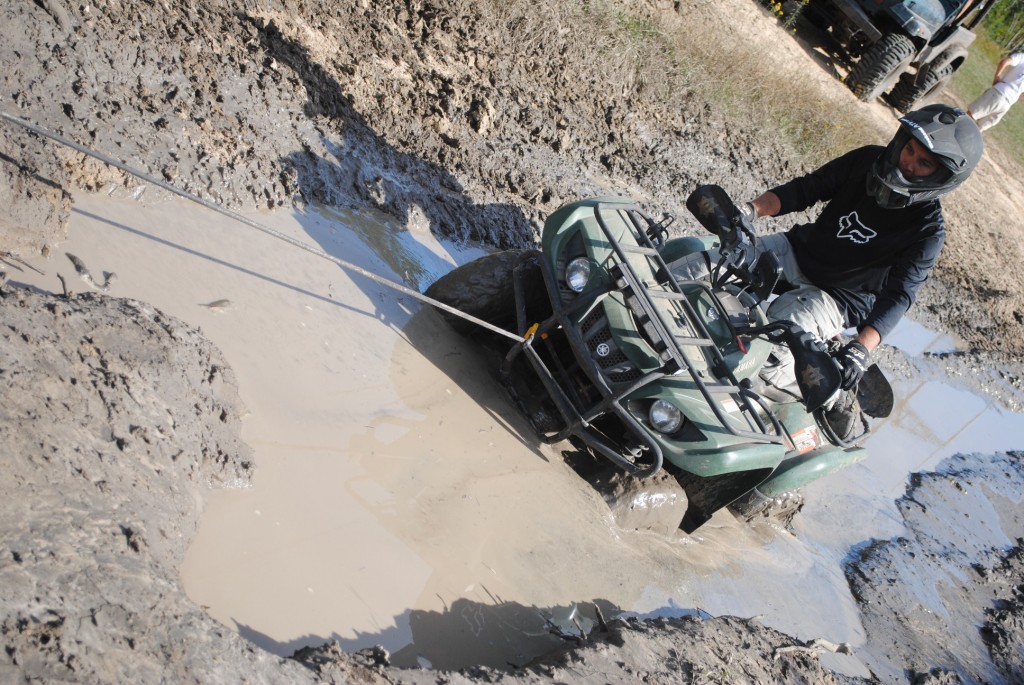
We were able to find several testing opportunities for our Lil’ Bubba. Combined with a shackle, the Lil’ Bubba was easier to use than a standard tow strap.  The kinetic energy produced from the jerking motion easily pulled our full-sized ATVs out of the muck. Clean up is as easy as rinsing it off, though don’t expect it to ever look quite as clean as new.

Bubba Ropes come with a strap and a mesh duffel bag for easy carry. MSRP on a Lil’ Bubba is $69.00. The loops, or eyes, of the rope are available in yellow by default. For an extra $20 you can get them in black, orange, green, blue or red. If you tend to get bigger objects stuck they have a rope for that too. Bubba Ropes are available in several diameters and lengths with breaking strengths up to 131,500 pounds.

We’ve all seen the remains of broken ropes and straps around mud holes. Having a Bubba Rope means you won’t have to worry about whether or not you are prepared.

For more details or to purchase see: http://www.bubbarope.com